Overview of creating Power Apps from Figma

Power Apps and Figma? How is this even possible. Technology goes forward and many many things change around us. Last year I was working on Power Apps project. We were creating an app for public sector, where people would enter information about their overtime requests. Our main priority was a Canvas form. In our project team, there was UX Designer – Justyna 🙂 Justyna was designing whole layout for us and she worked with it in Figma. She introduced us and we started working with Figma as well.

In our case, Figma was mainly used by UX Designers to design Power Apps Canvas Apps screens, forms, buttons and more. We were moving designed layout to our Power Apps app. Power Apps Canvas Apps have very powerful set of functionalities helping developers adjust layout. So many of Figma designs were 1:1 moved to Power Apps Canvas Apps.

Enough of that s*** talk 😀 Let’s learn a bit.

Read or even scroll this whole article, because it is a special one – it’s written in a way that shows the process of creating a design live, without any experience gained before. You will see what problems there are and how to manage them. I made a critical error in Figma, so you can check how I managed to resolve all issues and come up with Lessons Learned.

What is Figma?

I am not a professional in Figma but I will try to explain it a bit if you didn’t meet Figma yet.

Figma is a powerful design tool that helps you to create anything: websites, applications, logos, and much more. So, it is basically a tool for designers to work with their designs of every type.

What is Power Apps Canvas App then?

If you are here, on this blog, I assume you have some knowledge about Power Apps Canvas Apps, but I will shortly explain it anyway 🙂

Power Apps is a component of Power Platform toolset which is mainly used for creating powerful, custom applications for data input and visualizations. There are two different types of Power Apps. Model-driven Apps and Canvas Apps. Today, we will focus on this second type.

Power Apps Canvas Apps are mainly used to work with many different data sources, forms and custom layouts of applications. In Canvas Apps you can create an app from scratch – at the beginning you are set with a blank screen, nothing else (unless you use a template). Power Apps Canvas Apps support custom layouts of an app, so this is why they came up with an idea of Figma – Power Apps kind of integration.

In Power Apps Canvas Apps you can modify many different parameters of a each single control – border thickness, colors, margin, padding, font, position and more. So, as you can see we can change a lot in terms of application’s design.

Figma & Power Apps - how it works?

Please, be patient, because before we start working with a design we must do one more thing.

Figma instructs us to follow a tutorial first, before we jump into a design.

Figma - instructions

I’m kidding xD. I did the instructions by myself and I will just shortly describe them to you. I won’t bother you with them here 🙂 If you want more information log in to your Figma account and click here.

Instructions:

  •  Remember that this is PREVIEW feature, so be aware of problems and bugs and avoid using this kit for final production apps
  • There is “Supported components page” and it is the place to see which components can be converted into Power Apps components. So, not every type of a component can be converted.
  • Figma let’s you create a design and Power Apps will convert that design into an app or a form, but after you convert the design into an app, you’ll still need to do additional work in Power Apps. For example, you’ll need to connect components to data, add Power Fx expressions to components, and so on.
  • Use Segoe UI font for the best experience, but there are couple of more fonts supported in Power Apps (for example: Arial, Courier New, Dancing Script, Georgia, Lato, Open Sans)
  • Don’t change component names and layers in Figma
  • Be aware of Font size conversions – Figma uses pixels for font size. However, Power Apps will convert those pixels to points. Specifically, one font pixel in Figma is equal to 0.75 points in Power Apps. For example, lets say you have text set to 32 pixels in Figma. Later when your design is converted, the text will be set to 24 points in Power Apps. 

What's supported in Figma

To get an idea of what’s supported, please check information from below:

Supported components are there for both tablet and phone layout.

Below, please find even more detailed information. How components look like in Figma.

Screen

Scrollable section

Button

Label

Text input, Dropdown, ComboBox

Toggle, Checkbox, Radio button

Slider, rating

Date picker

Listbox

Rich text editor

Timer

Working with Figma and Power Apps

I think the only explanation of a high level process for creating apps through Figma is this one, given us directly by Figma:

At a high level, there are four main steps for converting a Figma design into an app. When you’re done with this process, you get the visual components in a Power Apps canvas app, saving you the time of creating the user interface.

Note: After you convert the design into an app, you’ll still need to do additional work in Power Apps. For example, you’ll still need to connect components to data, add Power Fx expressions to components, and so on.

To start working with Figma go to Microsoft Power Apps – Create Apps from Figma UI Kit (Preview) (Community).

Then, click “Assets” at the top: 

Business scenario - Time registration app

Just before we start, we must think about a purpose of an app. 

I want to create a simple app for Time registration, where Users can input tasks with some additional information like time spent, name of an activity or description. Then, hours from those activities are summed and showed at the bottom. For our data source later we will use Dataverse!

Building a design in Figma

Now, we can start working with a design.

I will start by creating sort of a “Welcome screen”.

At first I grab Screen from Assets and move it in the area pointed by arrows:

Then, I detach instance (screen). It allows me to place other components on the top of the screen. To detach screen right click the screen and find option “Detach instance”:

Finally, I rename this screen.

Adding controls

Now, I can start adding controls. For welcome screen I will add Label with a heading, illustration and a button.

Problems with Segoe UI font

Here is important information for you. I had a problem with font Segoe UI in a browser. When I worked with my project in a browser I couldn’t work with that font I before editing any text I had to replace this font with some other one.

But after I downloaded Figma for desktop, Segoe UI font was available, so I kept working with this design in a desktop app!

Back to work 🙂

I almost finished Welcome screen, but I found out that I can’t change width and height button properties. So probably we must edit that later on if we would like to. It would be possible of course just to grab a corner of a button and extend it but it didn’t work either. Text of a button stays at the top left corner and it can’t be centered, so if you resize the button you can’t edit position of a text in this button.

Finally, my screen looks like this:

Not very much there, but I just wanted to create a good looking welcome screen 😉

Now, let’s move to the second screen which will contain a form for time registration.

Working with a form design in Figma

For my form I want to collect information about Time registration of tasks. Users using this app will provide information like:

  • Title (single line of text)
  • Date (date)
  • Completion time (two number fields: hours and minutes)
  • Task assigned by (person – combobox)
  • Project Code (choice)
  • Description (multi line of text)
 

Let’s add another screen and create a form! Remember about that:

If you’re designing a form, then only use the components listed under DataCards, and drag them on top of Forms only. Note: If you want to add a Submit button, make sure to drop it outside the Form section.

I will start by adding a new screen to my design. To do that I just simply go to “Assets” again and grab “Screen” control. Then I detach it. I also rename it to “Form_screen”.

Now I will add some fields.

This is how it looks when I just simply added required fields. I removed labels, because I will add them separately, because I prefer having label at the top of the field.

In this example I forgot to add “Form” control to a Figma design. I am talking about that later in this article. I just wanted to show you learning process and I was working with this design live while working on this article. This type of an article shows how I am working live with applications so you can see how I am dealing with possible problems. This article also shows what result you will get if you will not include Form control in a Figma design when you work on a form.

On the right I can change some properties of a field:

  • Type of a field
  • Width
  • Turn off/on label
  • Adjust layout
  • Change display mode
  • Add/Remove effects
  •  Adjust some other settings

These are settings of a data card:

And these are settings of a Control itself:

I will adjust now properties of a fields, so we can finish form designing.

Finally, my customized form looks like this:

I need to do one more thing in Figma – create a success screen if the form was completed properly. I will also add some “Go back” arrows.

Success screen looks like this:

Simple 😀 haha

Converting Figma design into an app

To conver Figma design into an app we must follow instructions given by Figma:

First step is obvious – log in into make.powerapps.com. Then, select “Figma (preview)” tile from the listed options:

Then we must fill the form that showed up. We must provide:

  • Name of the app
  • Link to Figma page
  • Figma personal access token

For the name, we just type the name of the app. As for the second one, we copy link to the page, where we were creating a design:

As for a token, you must go to your account settings and create a token by pressing “Enter” on the field “Create a new personal access token”. After that, token will appear.

Copy this token and enter it in the second field. You are all set up 🙂

After clicking “Create” Power Apps is working to create our app. I am super excited how will it work 🙂 Waiting!

And it didn’t work. It didn’t work at all. Almost anything was converted properly. Check it out by yourself:

This is how my form looks like.

  1. Fields were not converted or even migrated by some other type
  2. Top Headings were migrated but they were converted into white labels with white text I don’t know why (screenshot below). Everything in those labels is white xD
  3. In success screen my button is formatted incorrectly. The button is not converted properly.
  4. My arrow was migrated as a image with height of “0.0596923828”. And it was also white. To be precise the arrow is not even an arrow. It was migrated as a line.
  5. I can see that everything with changed color was migrated incorrectly, but this color was suggested by Figma.

I didn’t use this “convert a design” functionality before, so I can’t tell what went wrong. But, I will keep trying fixing this.

Fixing a design

I will try to do some changes to the design:

  1. Remove custom formatting
  2. Remove changed colors – everything will be black
  3. Provide some changes to fields
  4. Add one field with NOTHING changed

My form in Figma looks like this:

As you can see I removed custom formatting and added a field at the bottom.

Did it work? Obviously not. Check converted app view:

And a tree view:

I can’t understand why my new field was not migrated. I am starting to think if naming of Figma components has something to do with it. Because DataCards are not starting with “msft_”. Or maybe I am missing something?

Figma design for the win

Now, I want to check sample Figma app design. We will check how they are creating these forms.

This is the sample form:

And these are the components:

What I was missing..

As you can see I am missing some information in my design. I don’t have something like “msft_Form” control. I somehow missed it when I started working with a form. I am also missing button to save the data 🙂 Let’s fix my form!

I am not gonna like this Figma tool.. I am working with this design for couple of hours now. The (not) funny thing here is that you can’t adjust height of fields. You can change the size of a datacard but not a field. So, without a scrollable screen you will not be able to create a proper form with couple of fields. What is more you can’t do more columns than one in the form. So you are left with one column with just couple of fields. I am already running out of space. Damn..

What you can't do in Figma?

In short, Figma limitations are:

  • You can’t adjust height of a control
  • You can’t create two column form
  • Labels with custom colors are converted white (all colors are white)
  • Custom formatting is not converted at all
  • You can’t work with data source or at least some of properties of that kind in Figma
  • Not all controls that are available in Power Apps Canvas Apps are available in Figma
  • My “go back” arrow was converted as a line with 0.05 height.
  • Colors properties of fields are in RGBA format – this will be a problem when you work with custom coloring in your app
  • Naming convention for Power App Canvas Apps is not respected (fields are named like this: DataCard27283347)
  • Buttons are very often not converted properly – you also can’t resize buttons
  • For forms you must always work with datacards – there is no option of creating a form with only fields
  • Labels are not converted properly – width of a label is very often not respected
  • I don’t remember more..

Final design and final result

For the purpose of this article I will remove this last field and I will add a button, then I will try to convert this design into an app. This is how my design looks like in Figma:

That looks terrible if you ask me 🙁

Now, let’s try convert this app. I will show you a result now:

Lessons learned

So, a design was finally converted successfully. But I am not very happy with a result. I totally expected that the form should finally convert. But what is missing here is to have a power of Power Apps design to create custom forms in Figma. Suprised? I think that many of key features from Power Apps design are not yet present in Figma. For example creating two-column form or creating a form without adaptive cards. 

For now, adaptive cards are the only possibility to create forms. I don’ use “Form” property in Power Apps Canvas Apps anymore and I don’t work with datacards either. I like having full control of a form, fields, properties and a design. I the past I was creating very powerful custom form that worked really well and for a submit I used mainly Patch( ) function, not SubmitForm( ).

So, if we want to have multiple columns in this form, we must finish a design in Power Apps Canvas Apps itself. And if we want some other things (like adjusting height of the fields), we must do that in Power Apps, not in Figma.

What we must do now, to make this form work properly:

  1. Add a data source
  2. Change properties of fields (defaults, items, text and stuff)
  3. Change a design – resize form, configure form to 2 column form, change height
  4. Configure Submit button behavior
  5. Add Navigation panel, because my arrow is not migrated properly, so I must add it from Power Apps
  6. Test the form and fix bugs

So, we have couple of more steps to do before we can tell that this form really works. I think it is not worthy – for now. 

I will not finish that form, because you can already see what capabilities Figma to Power Apps has and that was the point.

Let’s jump into the summary.

Summary

Yeah, this is the state of my mind right now. Anyway, this article was very special, because I was creating this whole thing live with you and I was reviewing my mistakes with you as well. That’s why it was so important to read this whole thing.

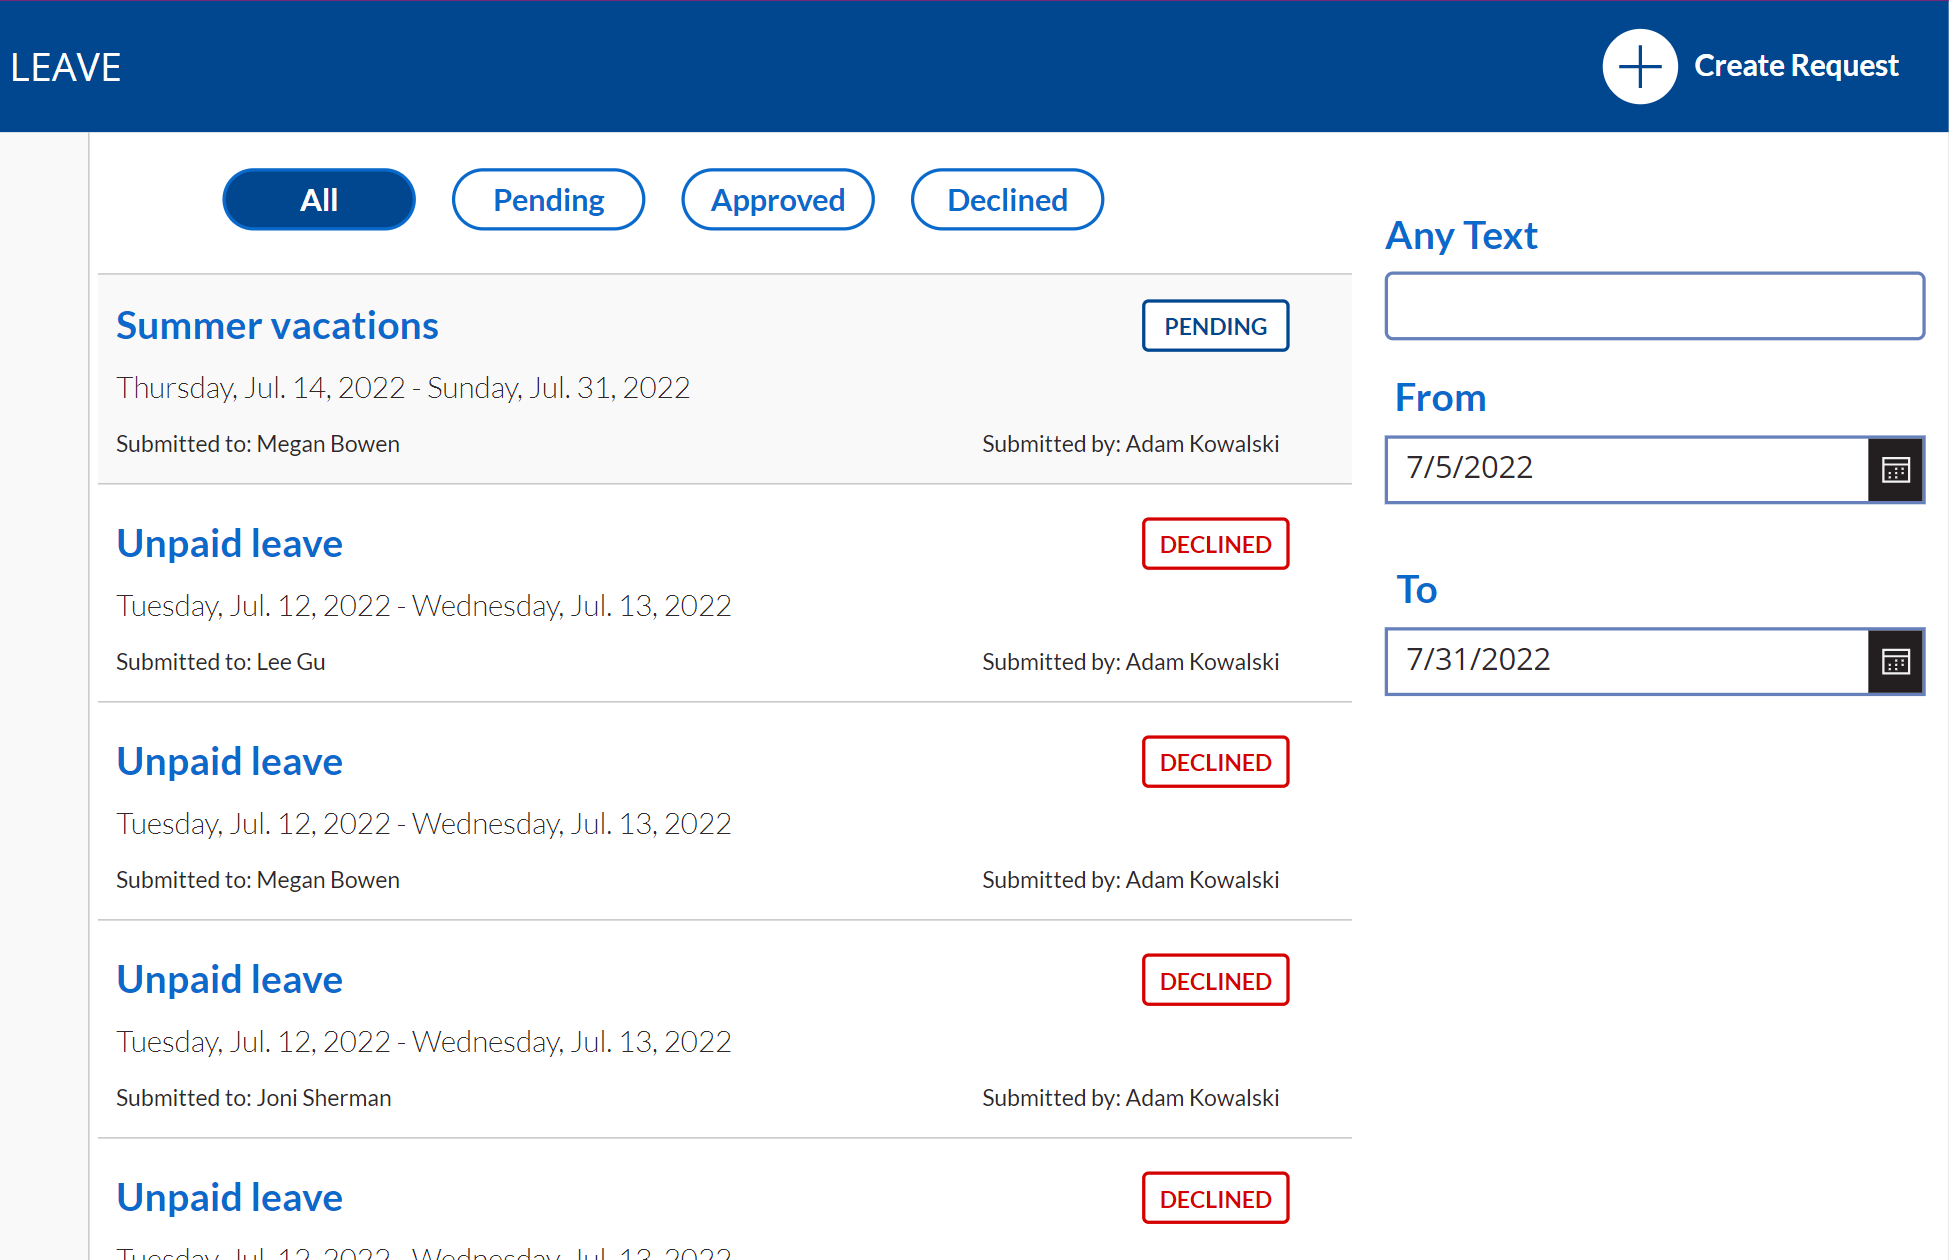
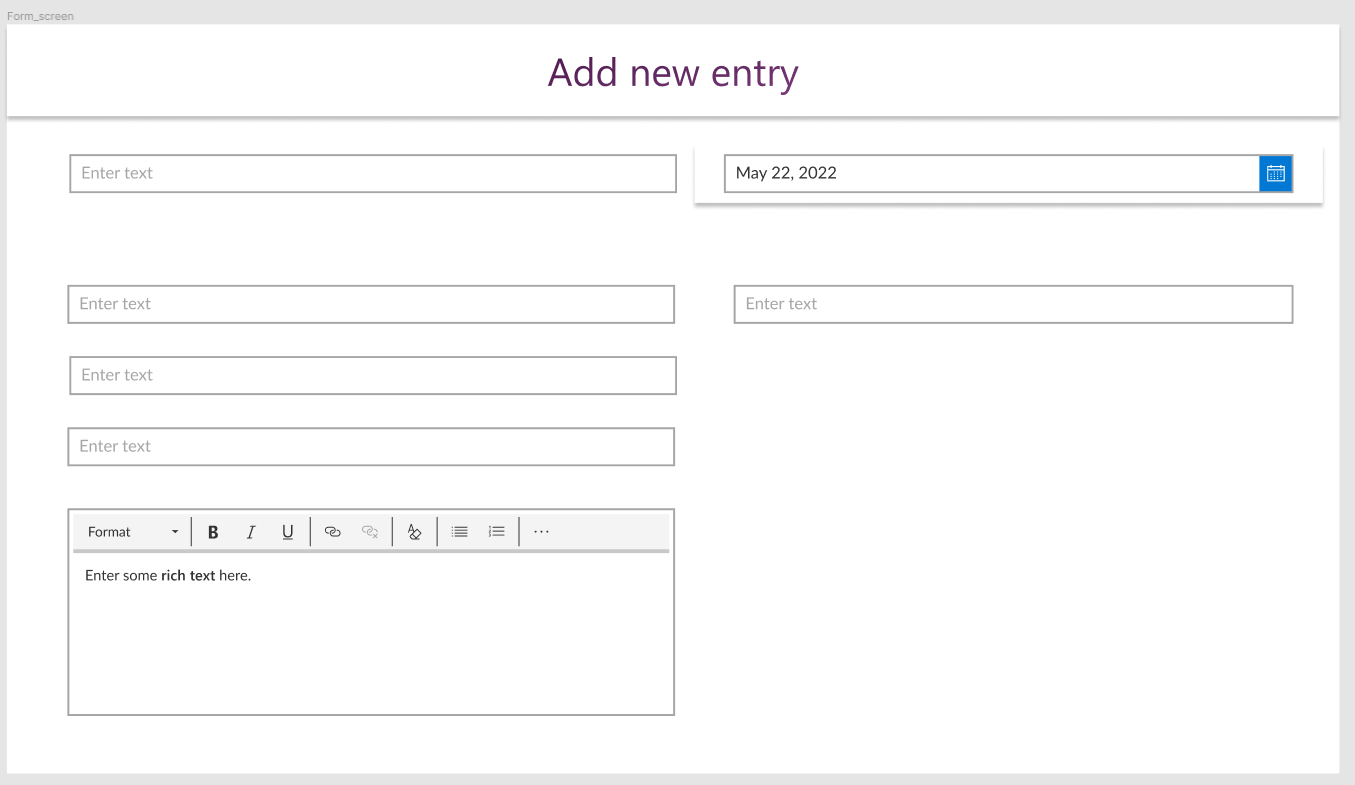
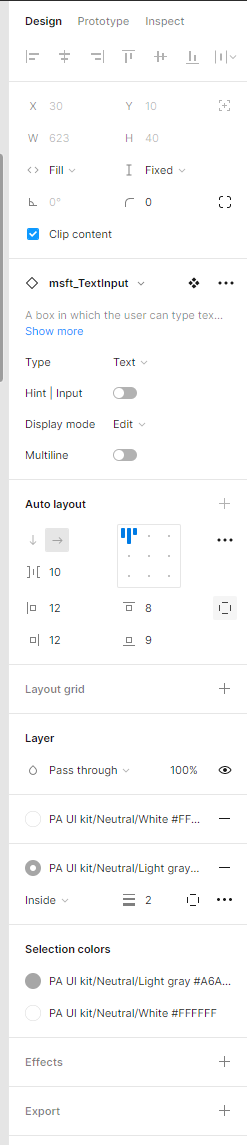
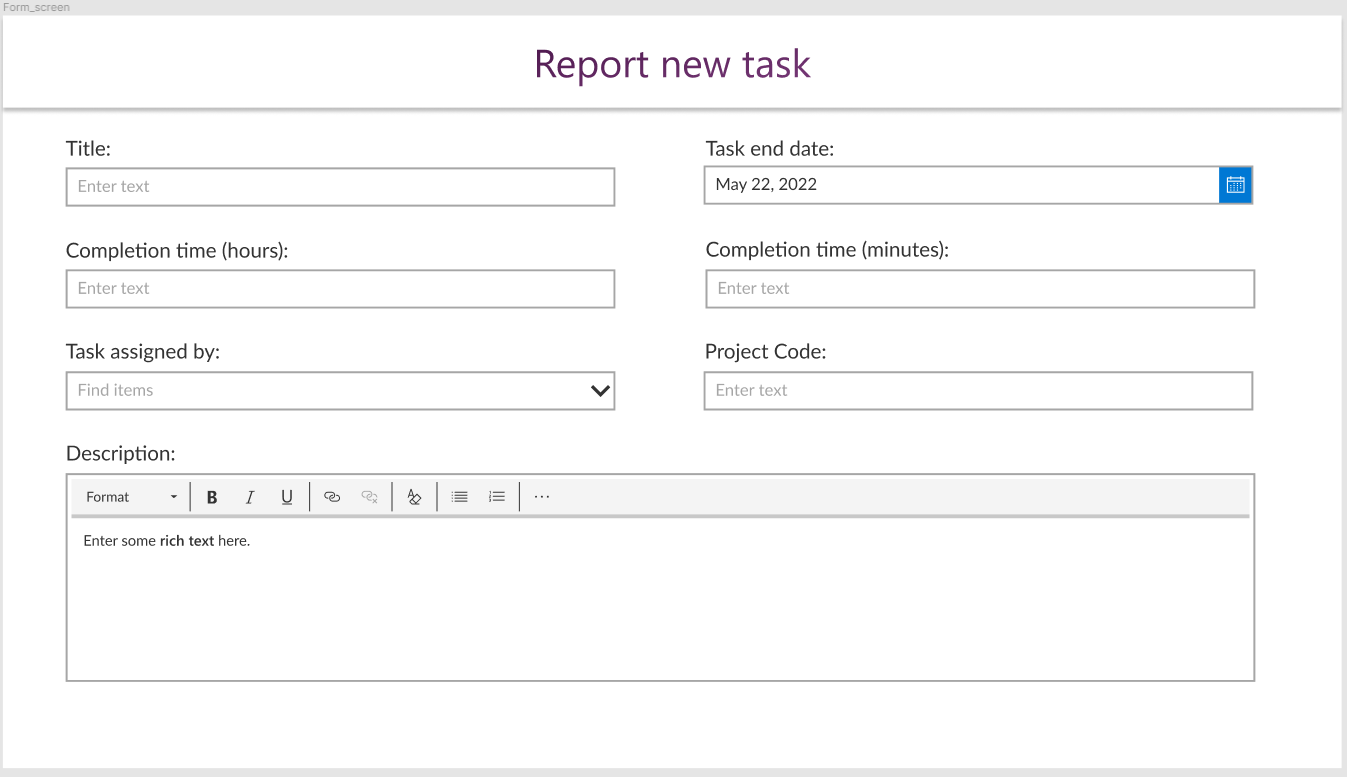
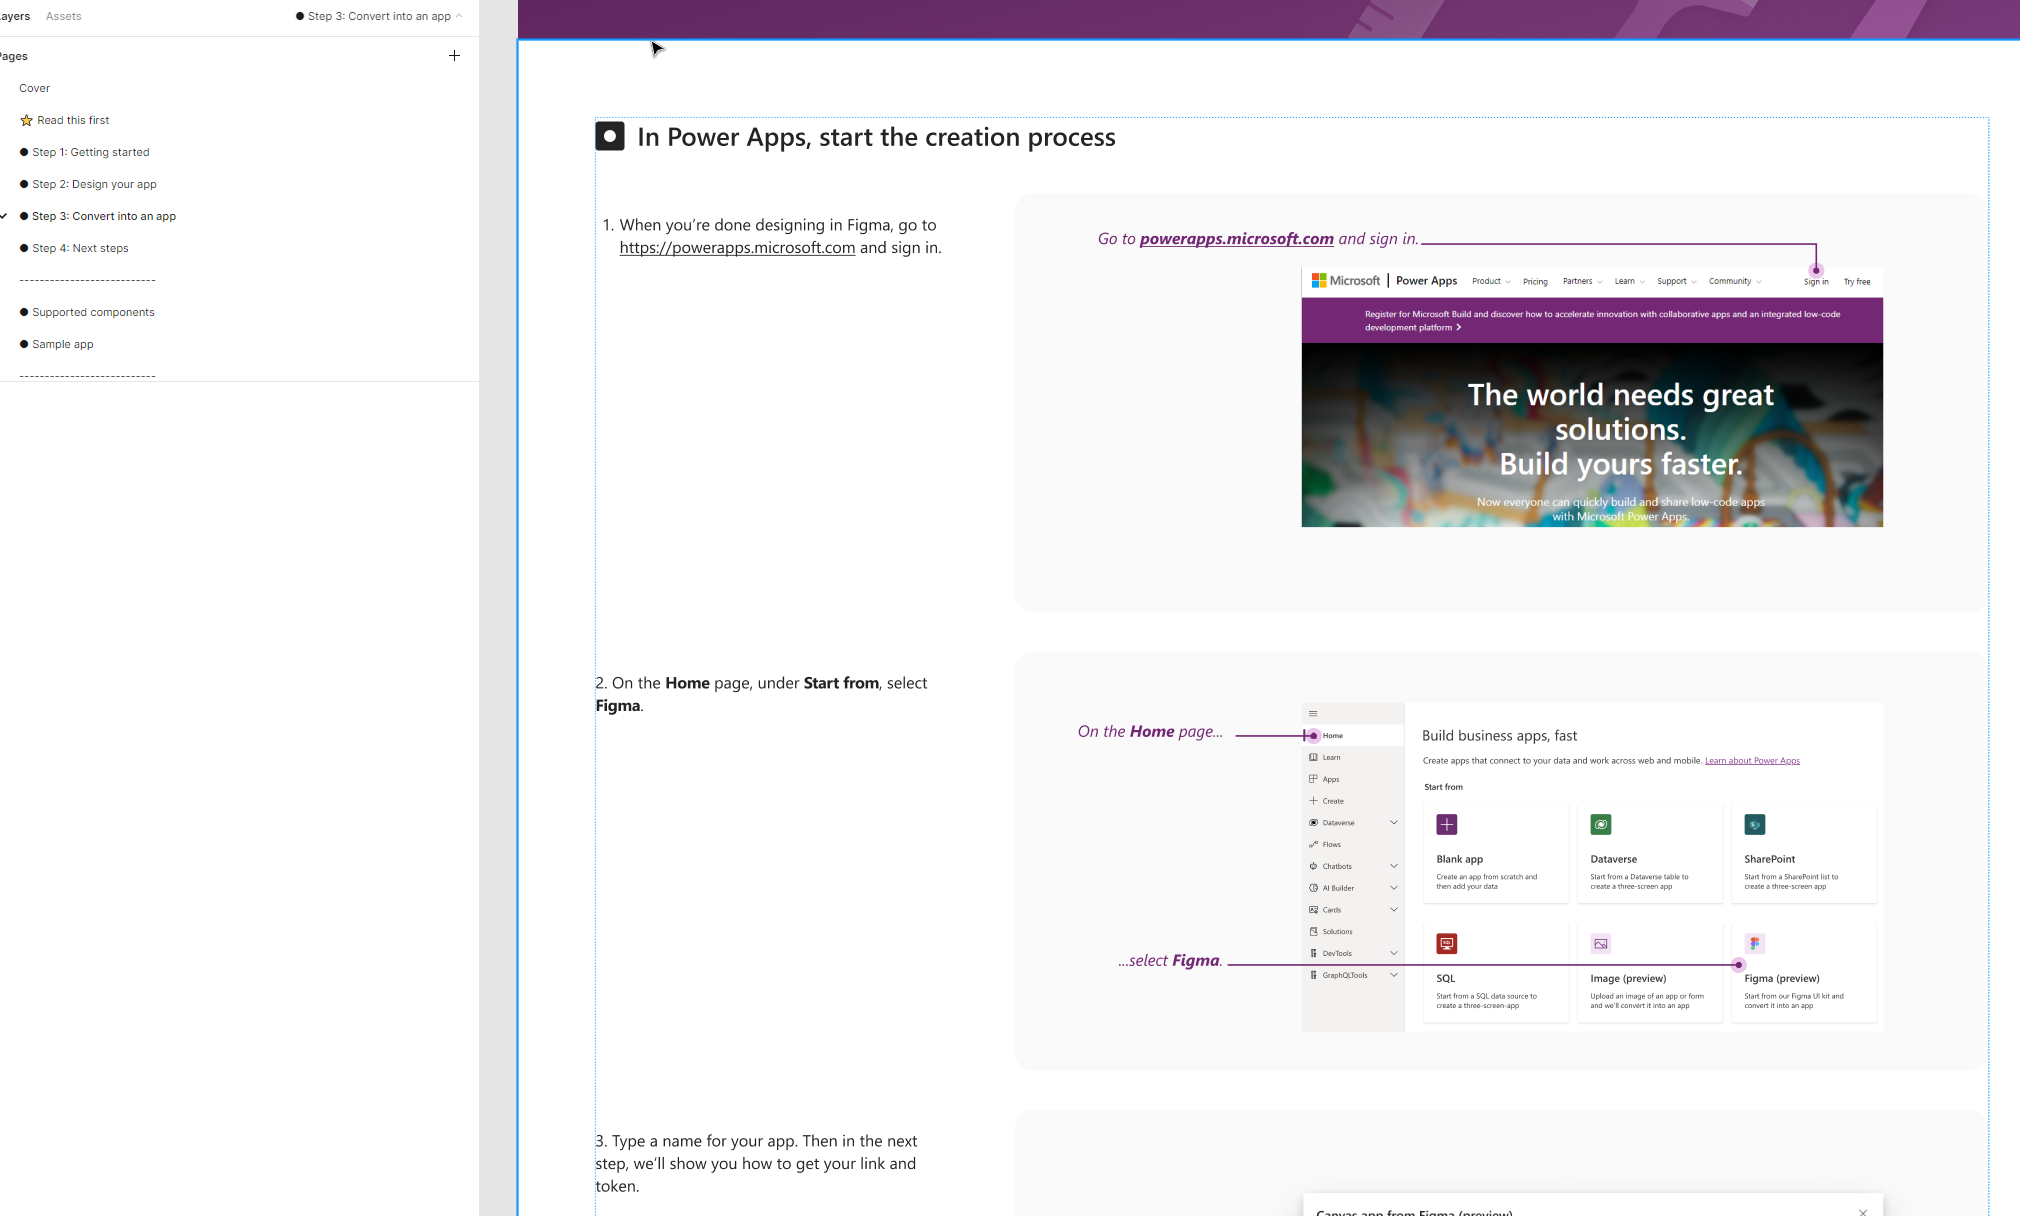
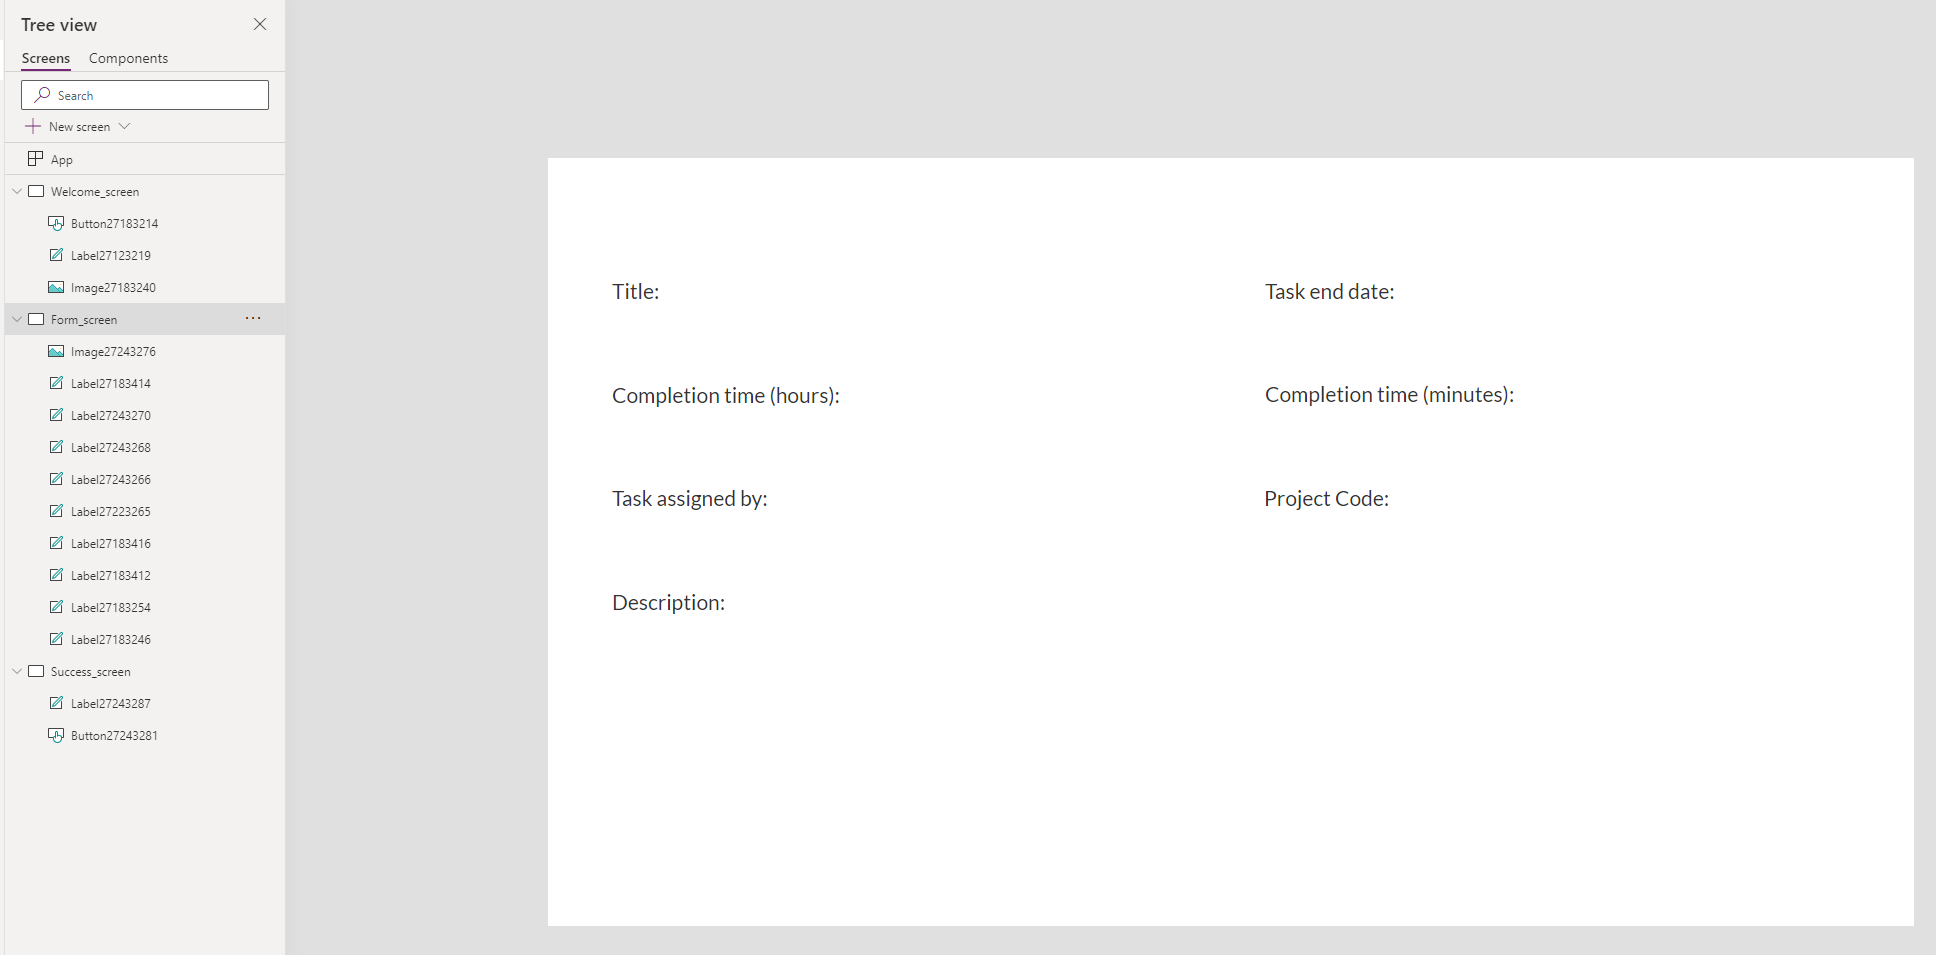
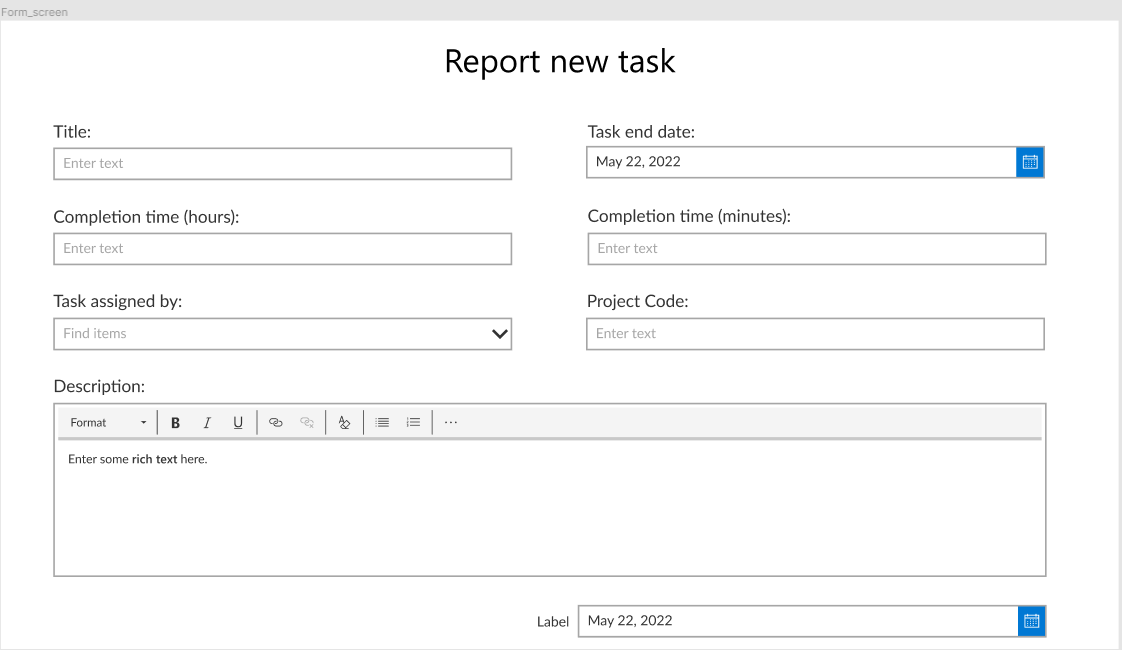
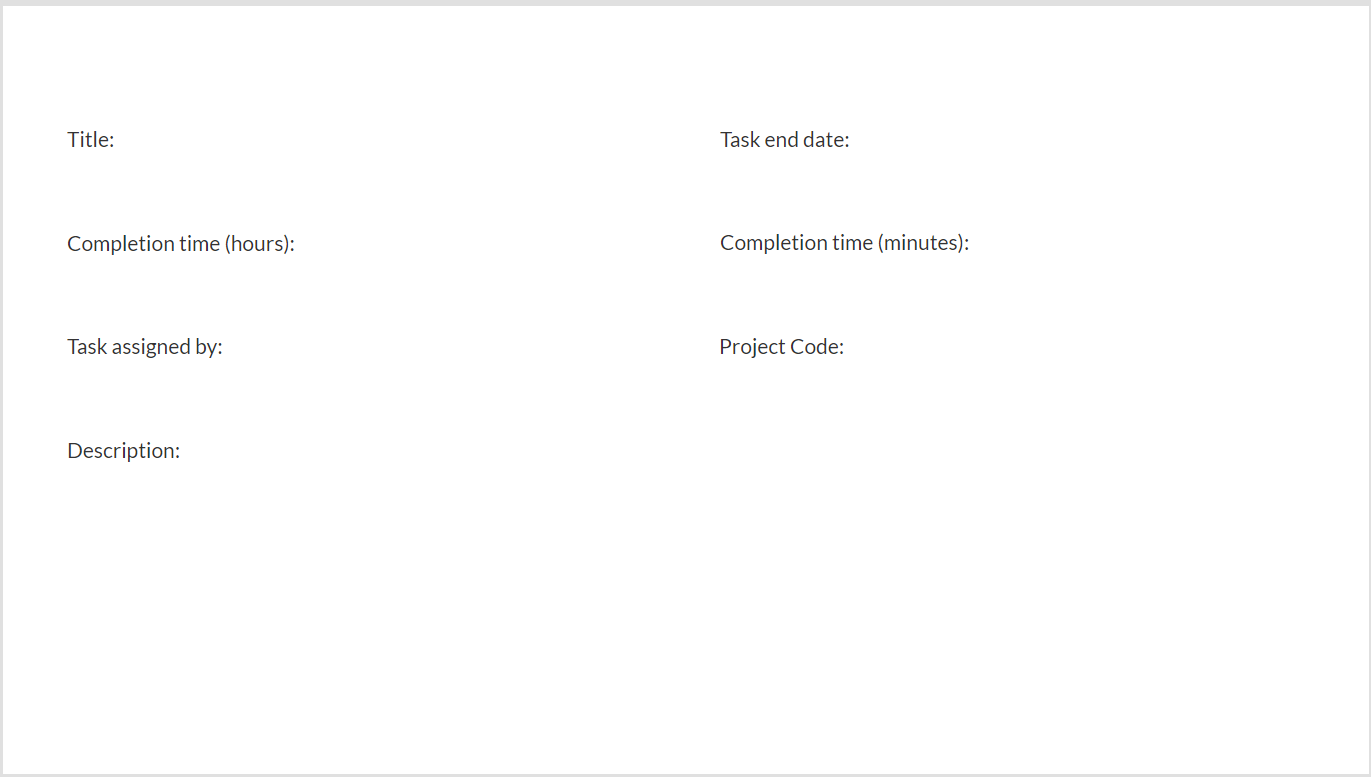
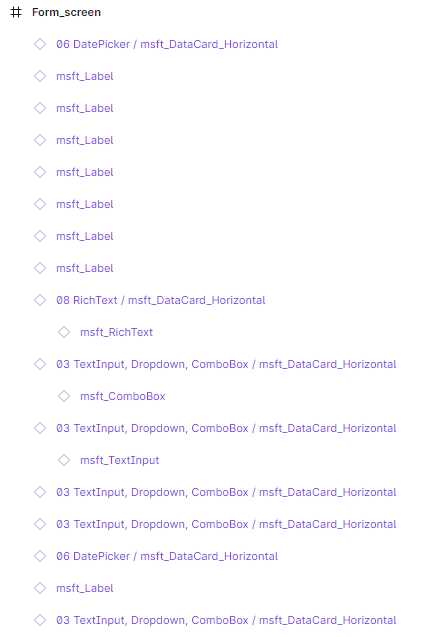
As for this tool. I think it still requires a lot of work. This design functionality would work pretty good for vertical (mobile) applications where you have one column and scrollable screen. I think that properties like position or height are extremely important, but for now they are not editable in Figma. As I mentioned previously many things is not there yet. At least this is my experience. At the end of a design process we are left with blank form that still required a lot of work, obviously. 

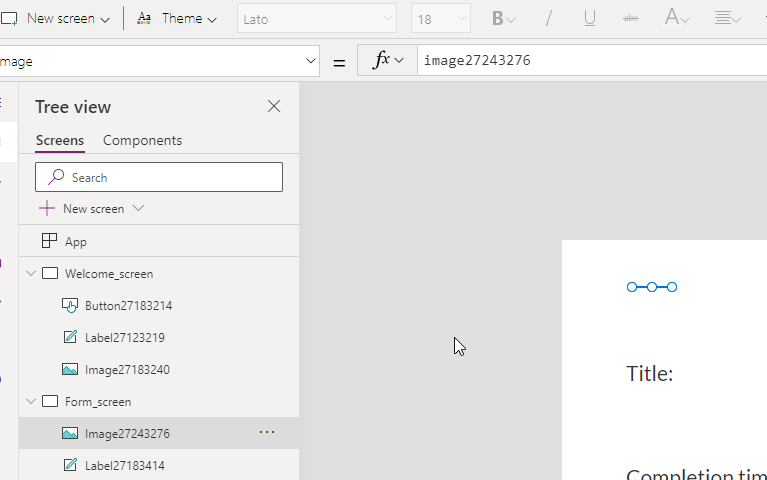
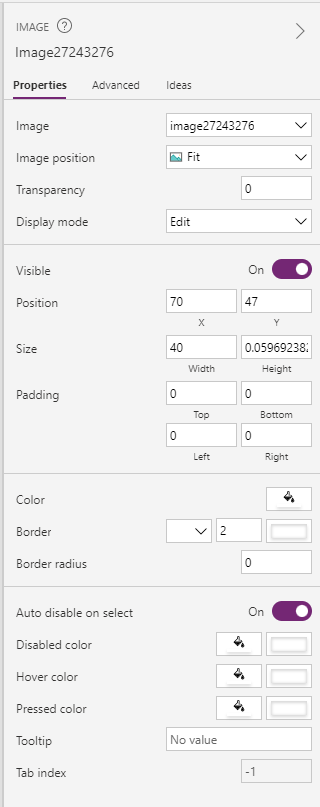
When I am work with Canvas Apps and I want to create custom layout with custom colors I always create global variables for my colors used in an app. Here, these colors are hardcoded into properties. If I would like to assign one color into a variable I would need to click every field and replace a certain colors with a variable and so on.. I hope you got the idea. This is why I think this tool is not really useful right now.

It may be useful for really simple app when we don’t need many customizations in Power Apps itself or the required design is so complex, that it should be made in specific tool for a designs, like Figma.

This is my 1st experience with this tool. Write down in a comments section what do you think about this! I am looking forward for some conversation about this idea 🙂

Thank you for your time, and for reading this article. Feel free to rate this article down here and comment if you liked it. If you have any questions feel free to contact me (via contact@poweruniverse.org), but first, you may be interested in joining a Newsletter? Hmm? (Sign up hereIf you already did, woow, thanks, thanks a lot 🙂 

Via Newsletter I am sharing with you insights of my work, plans for upcoming weeks and knowledge about Power Platform Universe and IT world 🙂 If you are interested feel free to join! To every person who joins I am going to send latest Newsletter as well!

See ya!

About the author

Daniel Ciećkiewicz

FOUNDER

I am a Senior Power Platform Consultant focused on Power Apps and Power Automate. I also worked as a Team Leader with responsibilities for every Team Member and their development paths. 

In my private life I like video games, sport, gaining knowledge and a taste of good Scotch Whisky! 

Oh, I almost forgot, I love our Polish Tatra Mountains!

0 0 votes
Article Rating
Subscribe
Notify of
guest

5 Comments
Oldest
Newest Most Voted
Inline Feedbacks
View all comments
trackback

[…] If you follow my blog I described this feature well on my blog previously. You can check it here: Overview of creating Power Apps from Figma.  […]

trackback

[…] Create a design using Figma – Power Apps has a very cool feature where you can create an application’s design in Figma and then import it to Power Apps. In one of my articles, I described it: Overview of creating Power Apps from Figma. […]

trackback

[…] my article on creating an application based on a Figma design? Here is a link to the article: Overview of Creating Power Apps from Figma. This feature is finally out of preview and is live! I am excited to see how it works now and if it […]

trackback

[…] Create a design using Figma – Power Apps has a very cool feature where you can create an application’s design in Figma and then import it to Power Apps. In one of my articles, I described it: Overview of creating Power Apps from Figma. […]

trackback

[…] If you follow my blog I described this feature well on my blog previously. You can check it here: Overview of creating Power Apps from Figma.  […]

5
0
Would love your thoughts, please comment.x
()
x