Send Approvals using Power Automate
Daniel Cieckiewicz
What must you know?
Approvals in Power Automate are straightforward. There are only three actions available, but we mainly use one action. Let’s jump into it and build our first approval process that works without further ado!
As for the business case, we will address it here: We are building an approval process for vacation requests. We are going to send approval to the Manager and the Director. So, we will make two approvals, and if the first is accepted, we will only send the second one.
Let's build it!
To start, we need to open our Hierarchy Tree application. If you don’t know what I am talking about, I will explain shortly.
Two weeks ago, I wrote an article on creating a working Hierarchy tree in Power Apps based on Azure AD. I even shared an application I’ve built so you can check it out! The link is here: Build a Hierarchy tree in Power Apps based on Azure AD. You can download the app from there.
Now, let’s open the app. We have to extend the application. We will create a simple form with a button to trigger the Power Automate flow. This is what my application looks like.
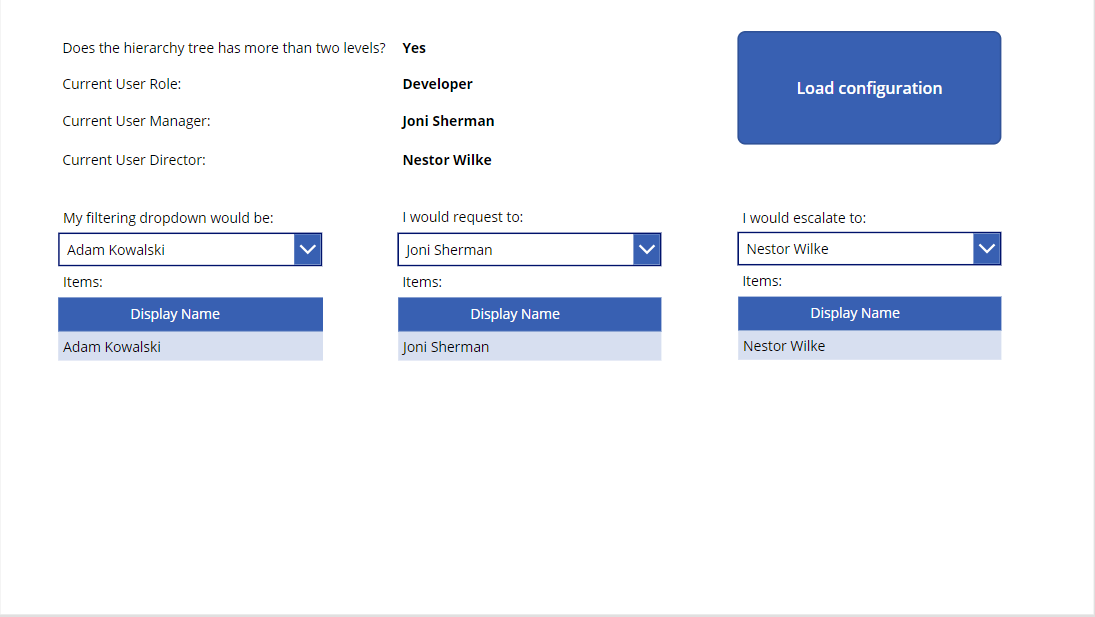
As for the form, we need to answer this question: What information do I need for my approval to work? My response to that is:
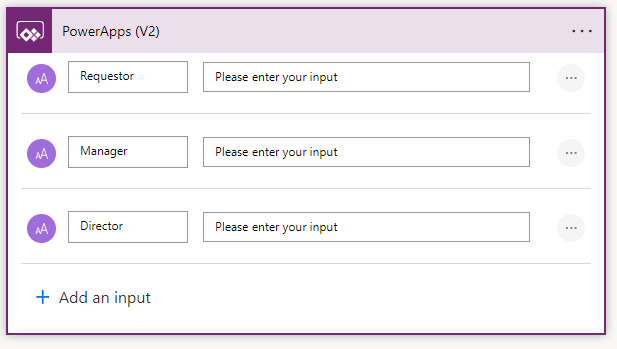
- Requestor – email
- Manager – email
- Director – email
That’s all. I don’t need to create any more fields for now. I can add columns like approval status or sent date, but let’s not bother with this now.
Customizations of the app
This is what my form looks like. Pretty functional and straightforward.
I added a new screen, three fields, and a button. Remember that this application and the form are based on the original “Hierarchy tree.” Almost everything here is just pasted from this application.
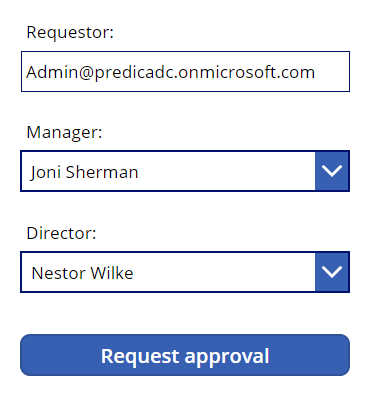
I am going to paste the formulas I used in those fields.
For the Requestor “Text” formula, we have something like this:
_currentUser.Mail
As for the Manager “Default” property:
					If(
    _loggedAS = "Developer" || (_loggedAS = "Manager" && _moreThanTwoHierarchyLevel),
    DirectReportsForRequests
)
And finally the Director “Default” property.
					If(
    _loggedAS = "Developer" && _moreThanTwoHierarchyLevel,
    myDirectorForRequests
)
Our button remains blank for a moment.
Adding a Power Automate flow to the app
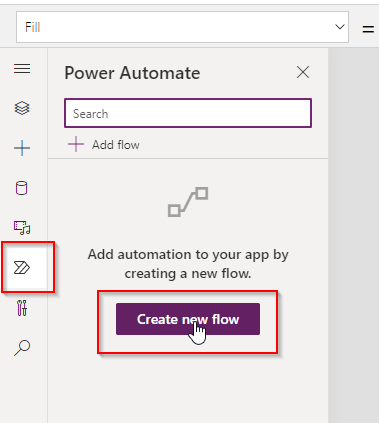
Now, we must add a Power Automate flow to the application. To do that, navigate to the left panel as I did here. Then click “Create new flow.”
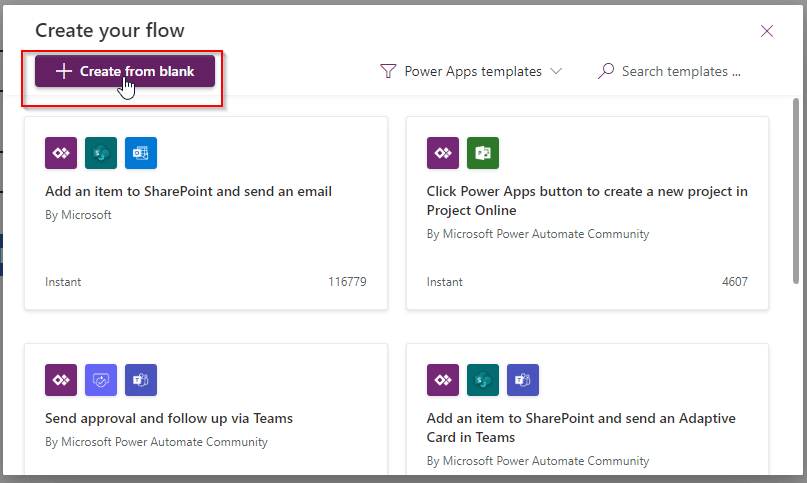
Press the “Create from blank” button because we don’t want to work with templates. We will create our flow by starting with a blank page.
Flow configuration
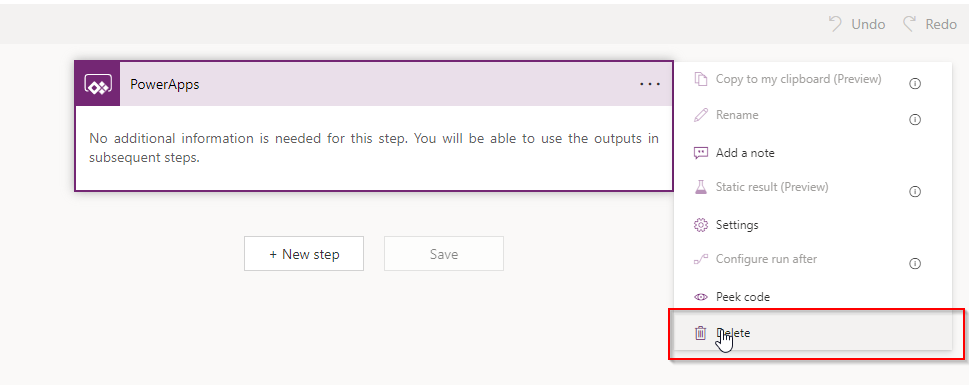
To start, let’s remove the old Power Apps trigger. There is a better trigger called “PowerApps (V2)” which we will utilize here.
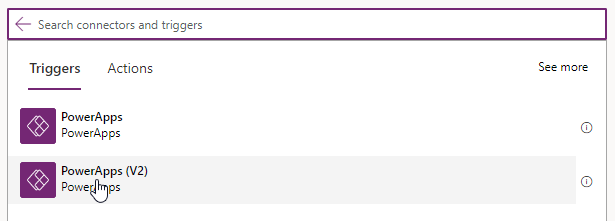
Now, add a new trigger.
In this step, we will provide parameters for the trigger. Those parameters are the form fields that we are going to use in this flow:
Approvals configuration
Now, the main part of the flow! Approval! Add new action and search for “Approvals”.
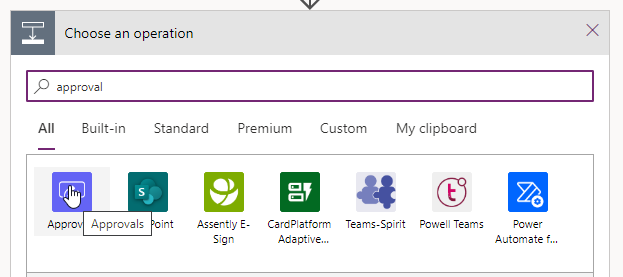
Our desired action for Approval is the “Start and wait for approval” action. Select in, and we will start the configuration process.
Check out the screenshot below. My configuration looks like this. The most important fields here are “Approval type,” “Assigned to,” and “Requestor.” “Title” and “Details” are important as well, and you can provide those fields with whatever suits your business case.
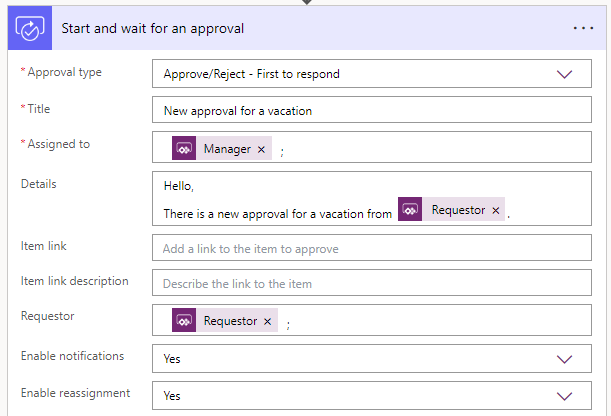
As for the configuration of the second approval – it looks pretty much the same.
Remember: We are sending two approvals, the first to the Manager and the second to the Director. So, we must configure the second action as well. Here is what it looks like:
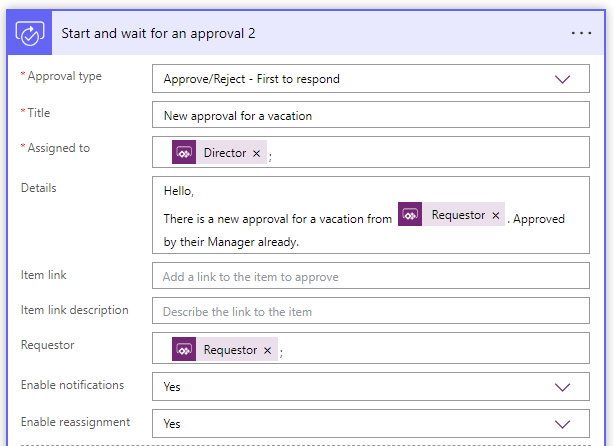
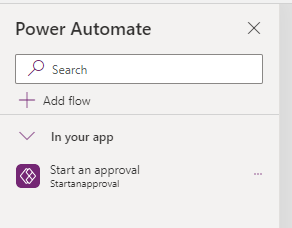
After this flow is saved, we return to the application. I renamed the flow, as you can see. It should be visible on the left Power Automate pane.
In this step, let’s open the button and provide it with a configuration.
We provide this formula for the “On select” property that passes our parameters to the Power Automate flow. So, when I click the button, the flow will be triggered, and parameters will be passed at the same time, so Approvals in Power Automate know what to do 🙂
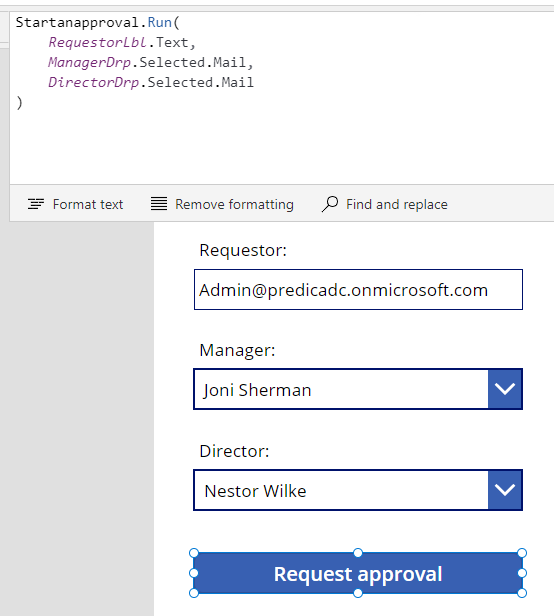
Here is a formula:
					Startanapproval.Run(
    RequestorLbl.Text,
    ManagerDrp.Selected.Mail,
    DirectorDrp.Selected.Mail
)
And there we have it! It is that simple. There is no configuration required for the application. We will configure our flow a bit, but it will take 2 minutes, and we are done.
Press the “Request approval” button to see if the first approval is sent correctly.
Testing
We are testing this in Teams. Those approvals work in the Teams app, and they look perfect!
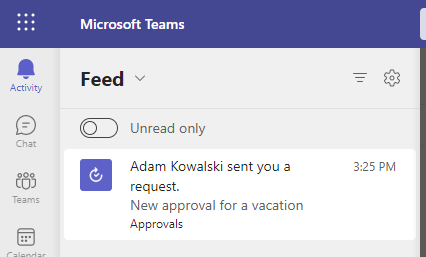
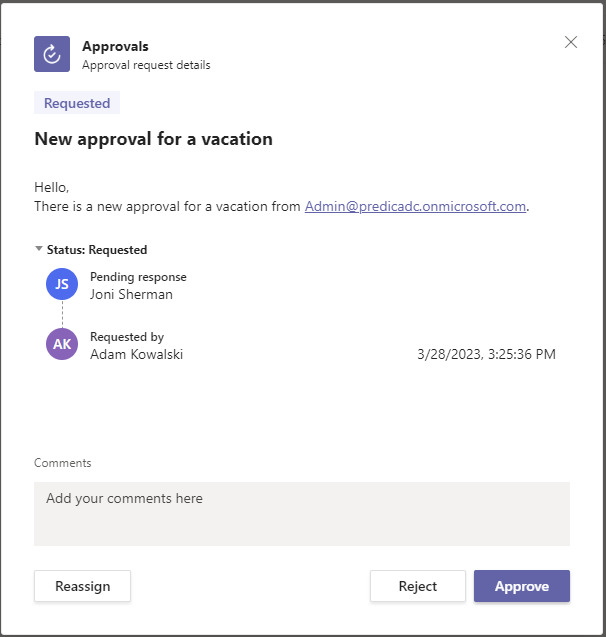
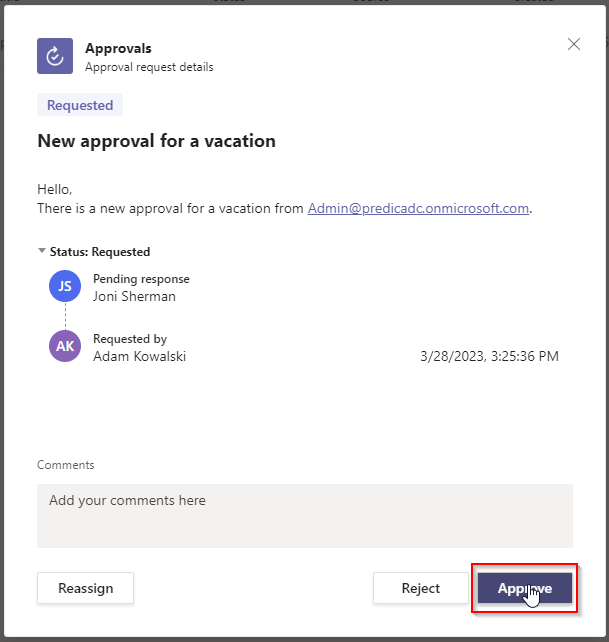
We can approve the request and then provide the last modification to the flow so it suits our business case.
Final configuration
We can approve the request and then provide the last modification to the flow so it suits our business case.
This is what our approval action looks like after our first test scenario. To see if the outcome of the approval is “Approve,” we must parse the “body” part of this action so that we can use the “outcome” field in our flow. We must do this because we will send the second approval only if the first one is approved.
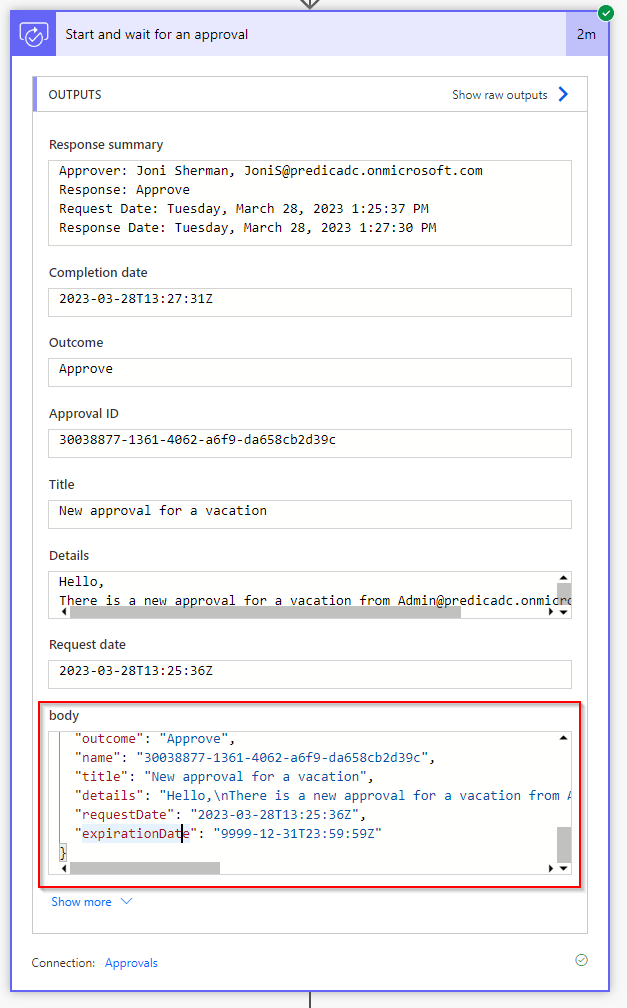
Let’s copy the “body” of this action from above and now add an action called “Parse JSON.” We must add this action right after this approval’s execution.
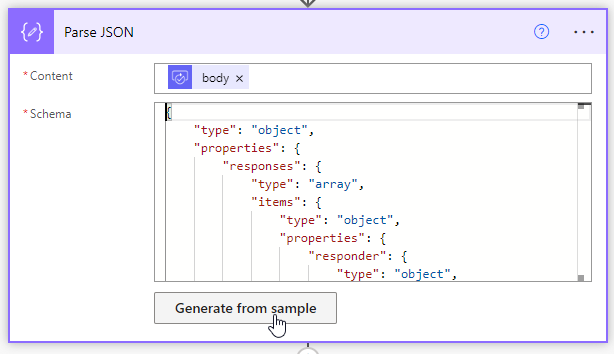
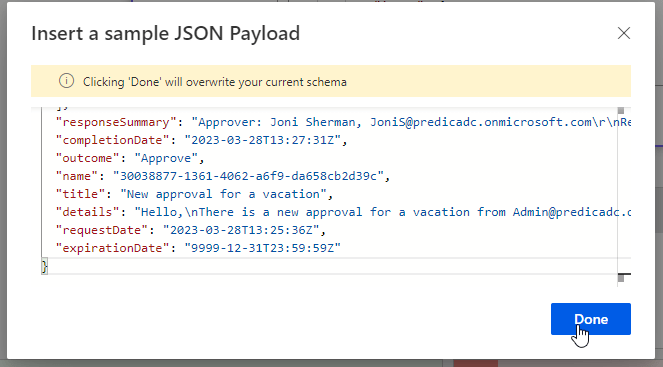
As for the “Content,” add the “body” of the approval from above, and for Schema, we will generate it using copied sample. Click “Generate from a sample” and paste copied JSON. Then click “Done.”
After that, add a condition that will run the second approval only then the first one is approved:
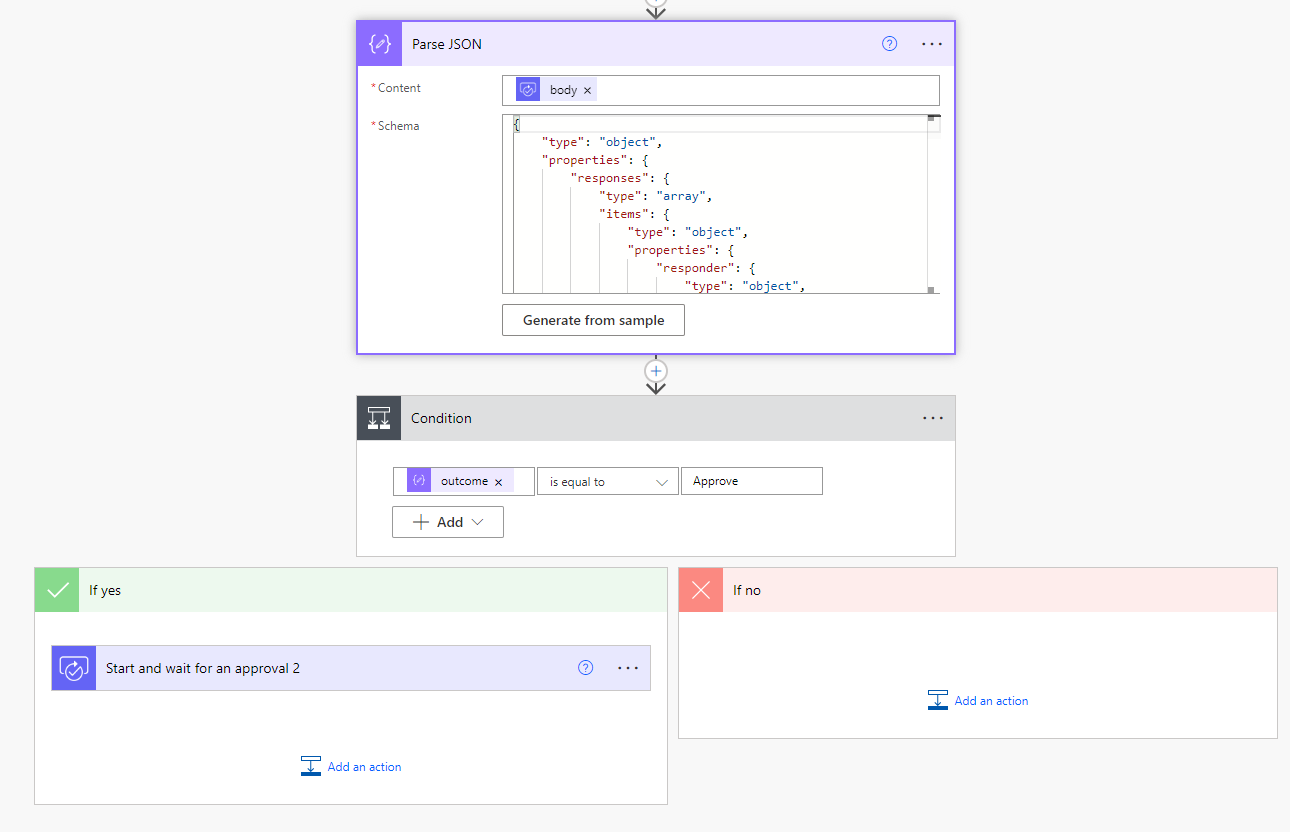
After that, add a condition that will run the second approval only then the first one is approved:

Final testing
Now, let’s press the “Request approval” button again and see how this works!
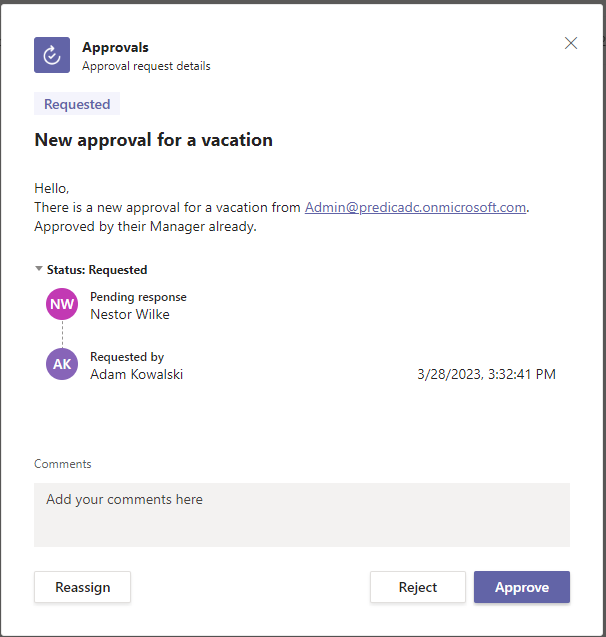
Here goes the first approval:
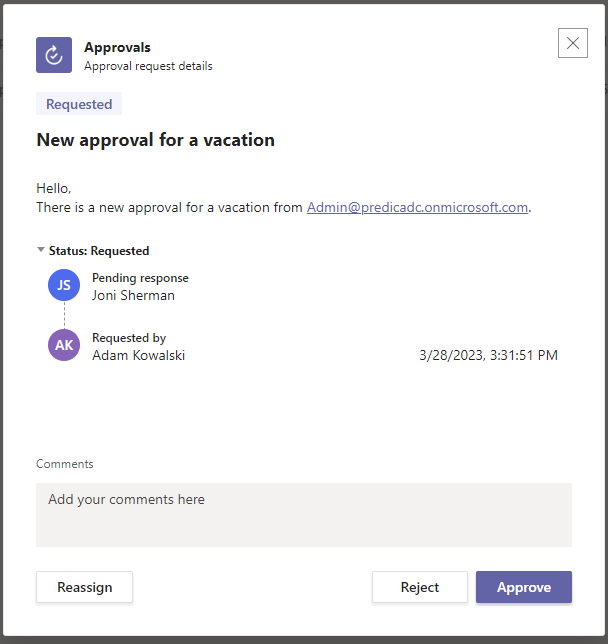
If we approve that, the second approval will be sent—this time to the Director.
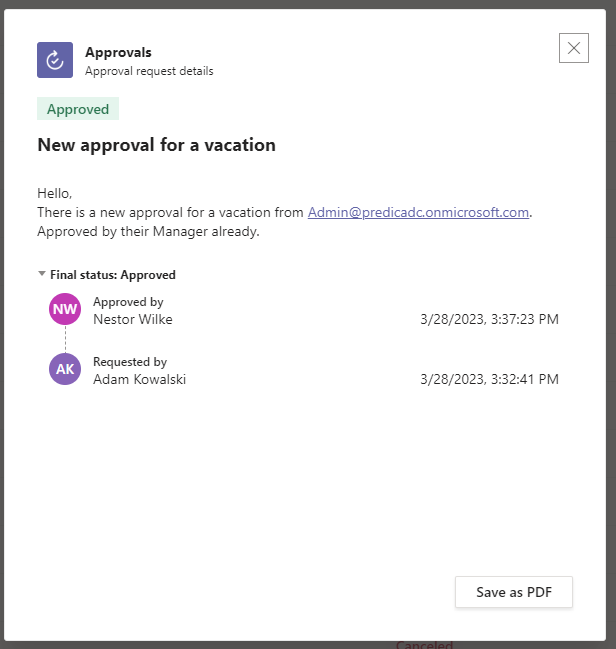
This is how this approval looks from the perspective of the Requestor.
Summary

This was quite a long article, but I didn’t want to miss any of the steps required for this to work. But it is straightforward at the same time. Power Automate approvals are one of the most simple but very needed features the business requires. You just saw how simple it is to configure it. You don’t need to be a developer to start doing this stuff yourself. I hope you learned something.
So, finally, we are at this point where I should thank you for your time and for reading this article. Feel free to rate this article and comment if you liked it. If you have any questions, feel free to contact me (via contact@poweruniverse.org), but first, you may be interested in joining a Newsletter. Hmm? (Sign up here) If you already did, wow, thanks, thanks a lot 
Via Newsletter, I am sharing insights into my work, plans for upcoming weeks, and knowledge about Power Platform Universe and the IT world. If you are interested, feel free to join! I am going to send the latest Newsletter to everyone who enters!
See you!

Daniel Ciećkiewicz
I am a Senior Power Platform Consultant focused on Dataverse, Power Apps, and Power Automate. I was also a Team Leader responsible for the Power Platform Team and their development paths.
In my private life, I like video games, sports, learning & gaining knowledge, and a taste of good Scotch Whisky!
Ooo, I almost forgot, I love our Polish Tatra Mountains!

Power Apps Licensing Explained
Power Apps Licensing – this is something every Power Platform expert must know. In this article I will walk you through the cons and pros of available plans.

Understand Delegation in Power Apps
In this article I will walk you through delegation in Power Apps and I will show you many interesting concepts how to work with delegation and understand Delegation in Power Apps!

Connection vs connection reference in Power Platform
In this article I will tell you what is the difference between connection and connection reference in Power Platform. It is very good to know the advantages.

Overview of a Tenant Isolation in the Power Platform
What is Tenant Isolation in the Power Platform? How does it work and how do you know it will be good for your organization? Check the article!

The most interesting Power Platform features of 2024 – Wave 1 update
Do you want to know what updates are coming in 2024? This article will tell you more about incoming updates for Power Platform in Wave 1.

Use a Service Principal to run Dataverse actions in Power Automate
Do you want to learn how to use a Service Principal to work with Dataverse actions in Power Automate? This article is for you. Check it out.
[…] No! The approvals connector is free. You can utilize it in both Power Apps and Power Automate. This connector is very popular because, with the use of this connector, you can automate almost every business process requiring approvals. And it’s easy to implement. There are some limits, of course, but this connector is generally handy. I wrote an article about creating an approval process based on this connector: Send Approvals using Power Automate. […]