Post Teams Adaptive Card with Power Automate
Daniel Cieckiewicz
What must you know?
Adaptive Cards are fascinating. I mean – very exciting and very powerful. With Adaptive Card, you can easily share information with a User and get some data back. Adaptive Cards allow you to communicate with Microsoft 365 Users via Teams chat or a Teams group channel.
You can create an Adaptive Card via Adaptive Cards Designer, introduced by Microsoft: Adaptive Cards Designer. Moreover, this designer is straightforward to use and autogenerates the configuration of an Adaptive Card for you – your JSON. You need to provide content for your Adaptive Card – choose and drag elements to your Adaptive Card. Everything else is automatically created for you, so after a couple of minutes, the Adaptive Card is ready to be used in Power Automate.
You can use Power Automate cloud flow to post an Adaptive Card in the Teams channel or chat with the Power Automate bot. There are predefined actions that allow you to get your work done quickly, so after 5 – 10 minutes, you can have your Adaptive Card visible in a Teams chat! It is that simple.
This article will show you how you can create and post an Adaptive Card in a Teams chat. Let’s get into it!
Adaptive Cards are a platform-agnostic method of sharing and displaying blocks of information without the complexity of customizing CSS or HTML to render them. You author Adaptive Cards in JSON format, with integrations that cloud apps and services can openly exchange. When delivered to a specific host, such as Microsoft Teams, the JSON is transformed into native UI that automatically adapts to its host. Therefore, process designers can now offer consistent UI patterns whenever they need to display information as part of a business process/automation.
Microsoft
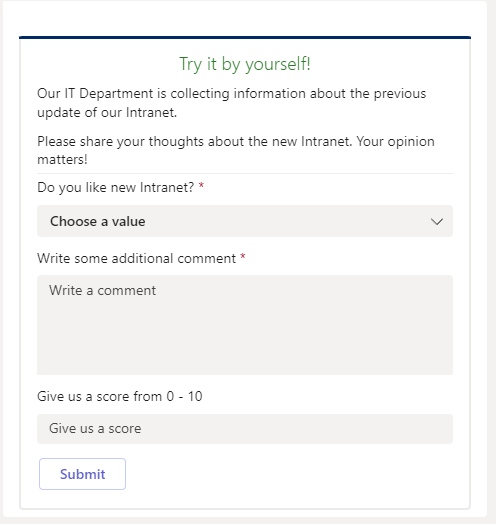
This is the Adaptive Card we are going to build!
The basics of adaptivecards.io (Adaptive Cards Designer)
Adaptive Cards Designer is a tool that helps you generate the JSON code required for Power Automate action allowing you to post Adaptive Cards on Teams.
Here is a list of the basics of Adaptive Cards Designer:
How to enter a designer?
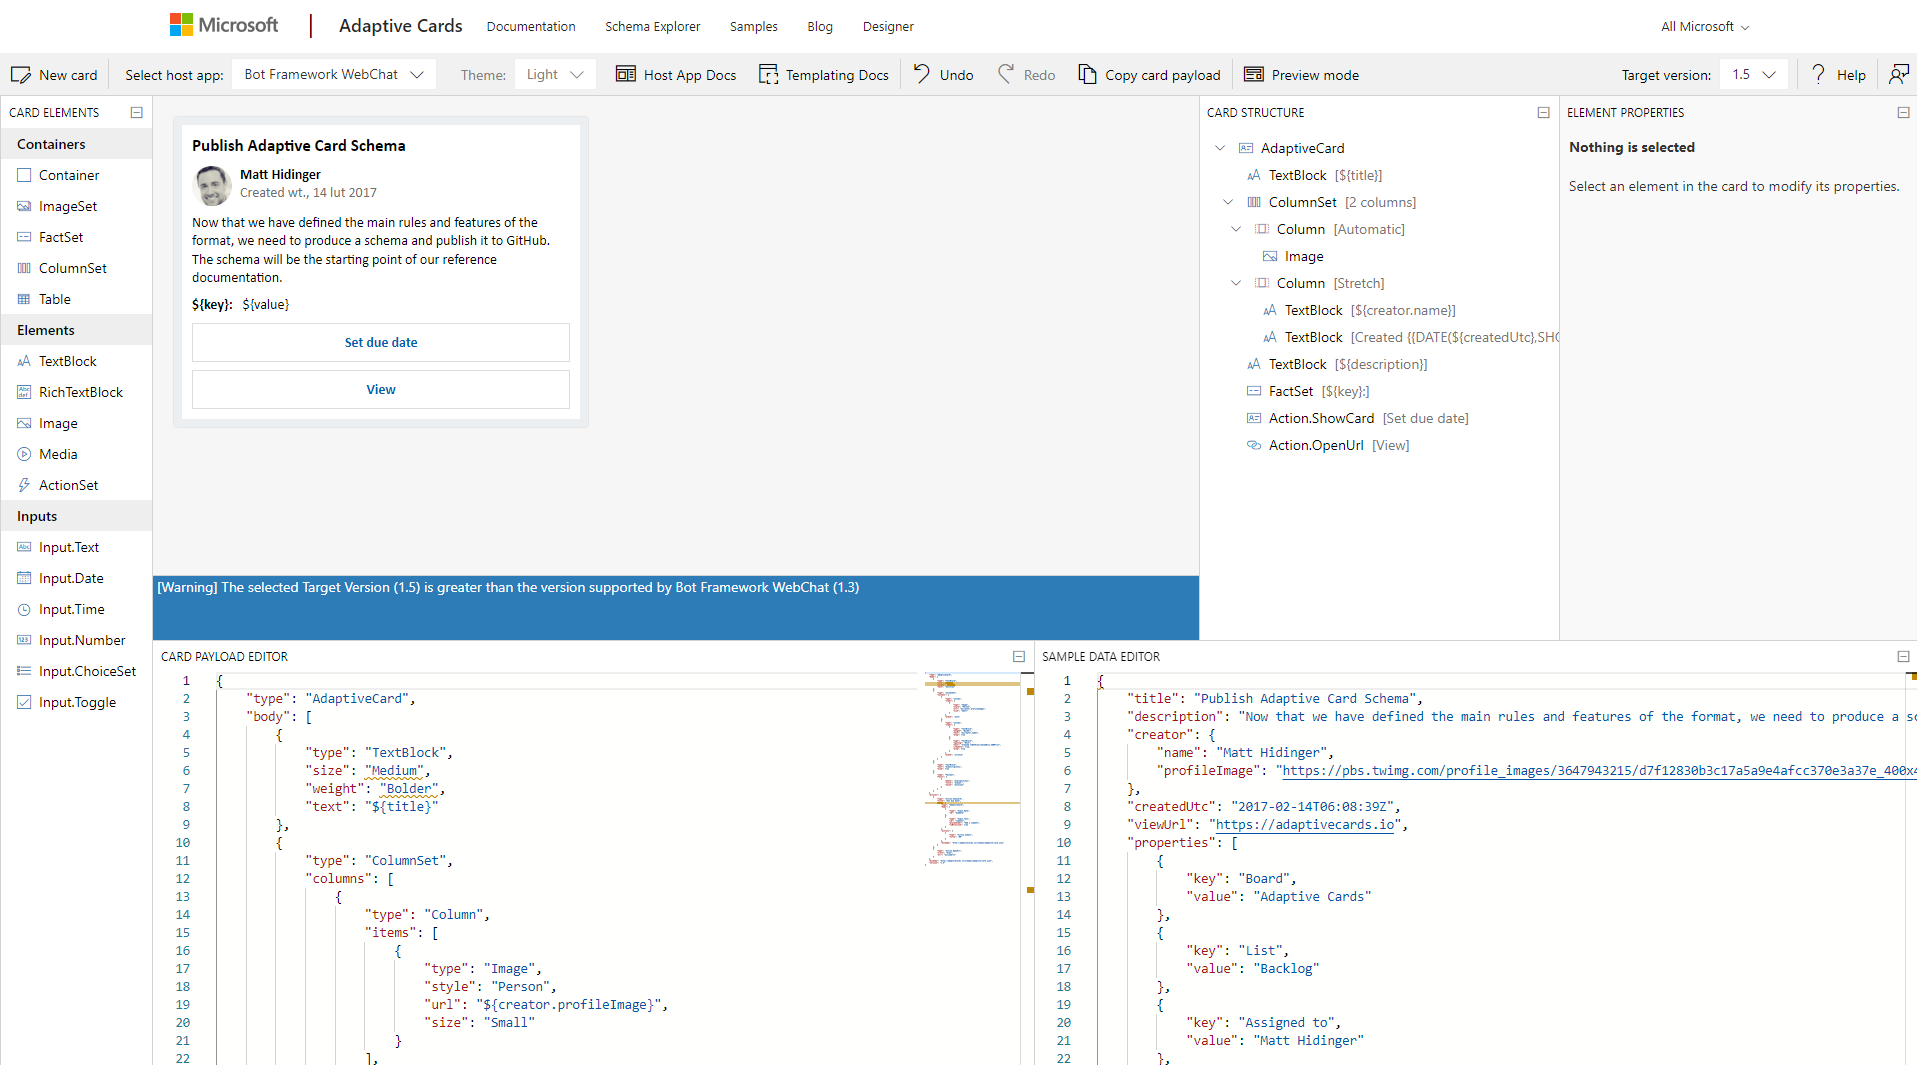
To enter an Adaptive Cards Designer, open this link: Adaptive Cards Designer. This window should be opened in your browser:
How to browse templates?
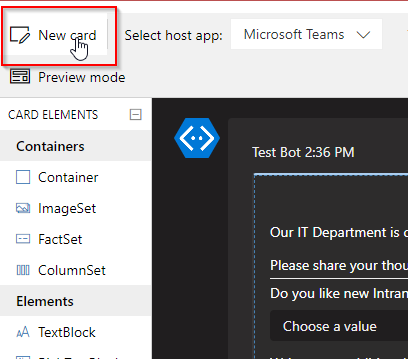
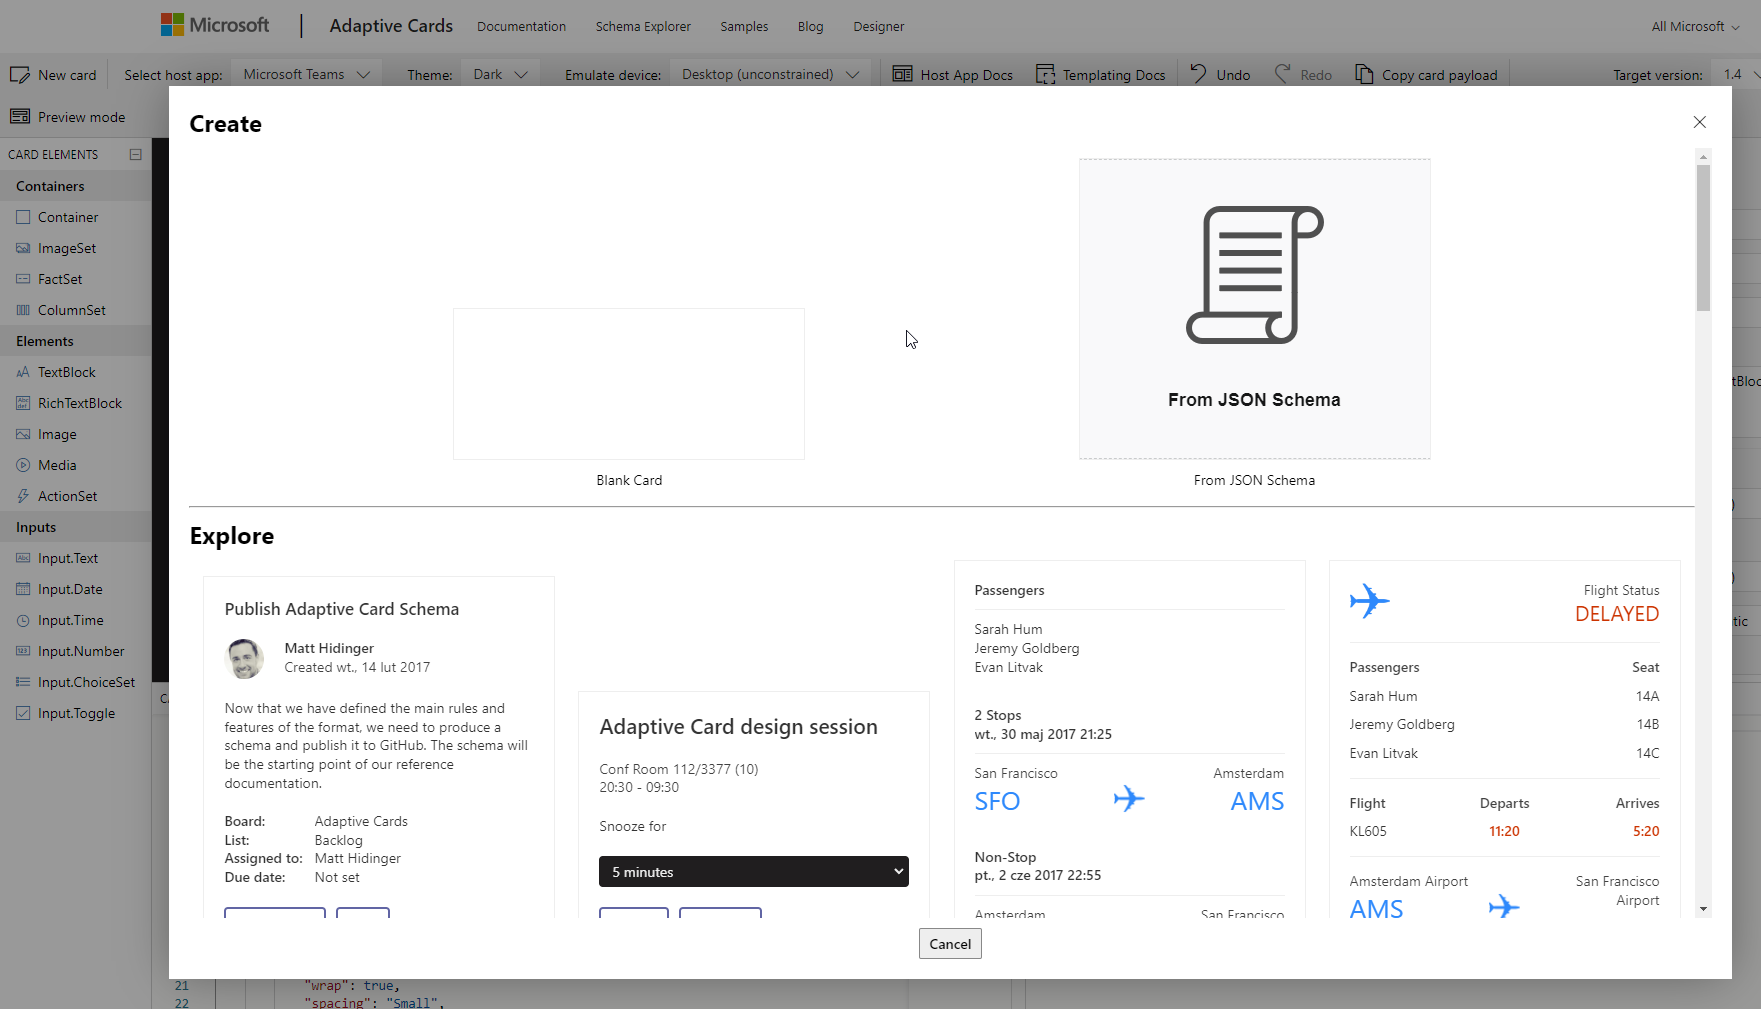
To browse templates, click the “New card” button in the top left corner and then browse through templates and choose what interests you.
How to work with Teams Adaptive Cards?
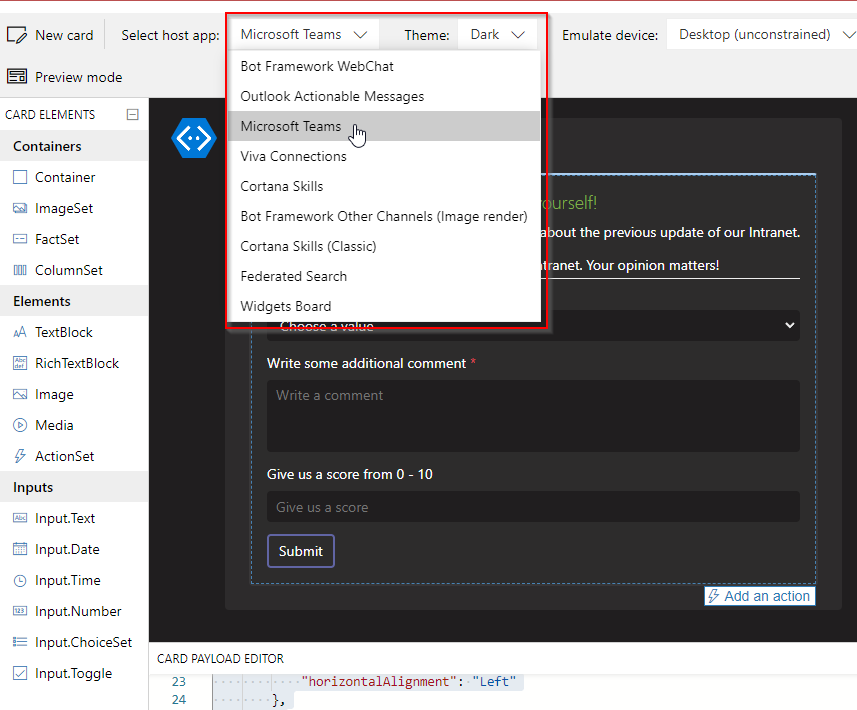
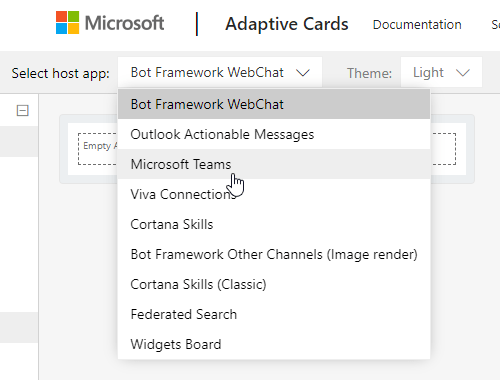
To work with Teams Adaptive Cards, you must switch a value in the “Select host app” field to “Microsoft Teams”. You can also choose a value in a “Theme” field. It will allow you to preview your Adaptive Card in the dark and default theme.
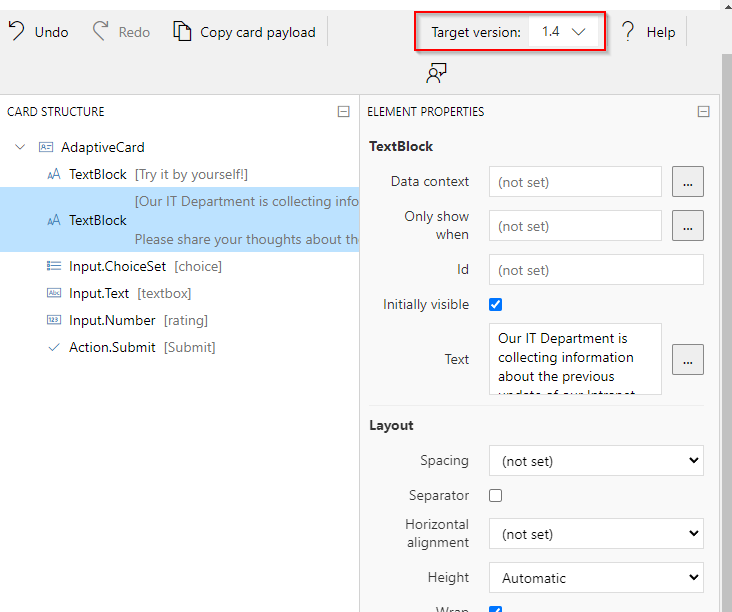
Remember that Microsoft Teams Adaptive Cards work with version 1.4 (as of January 2023).
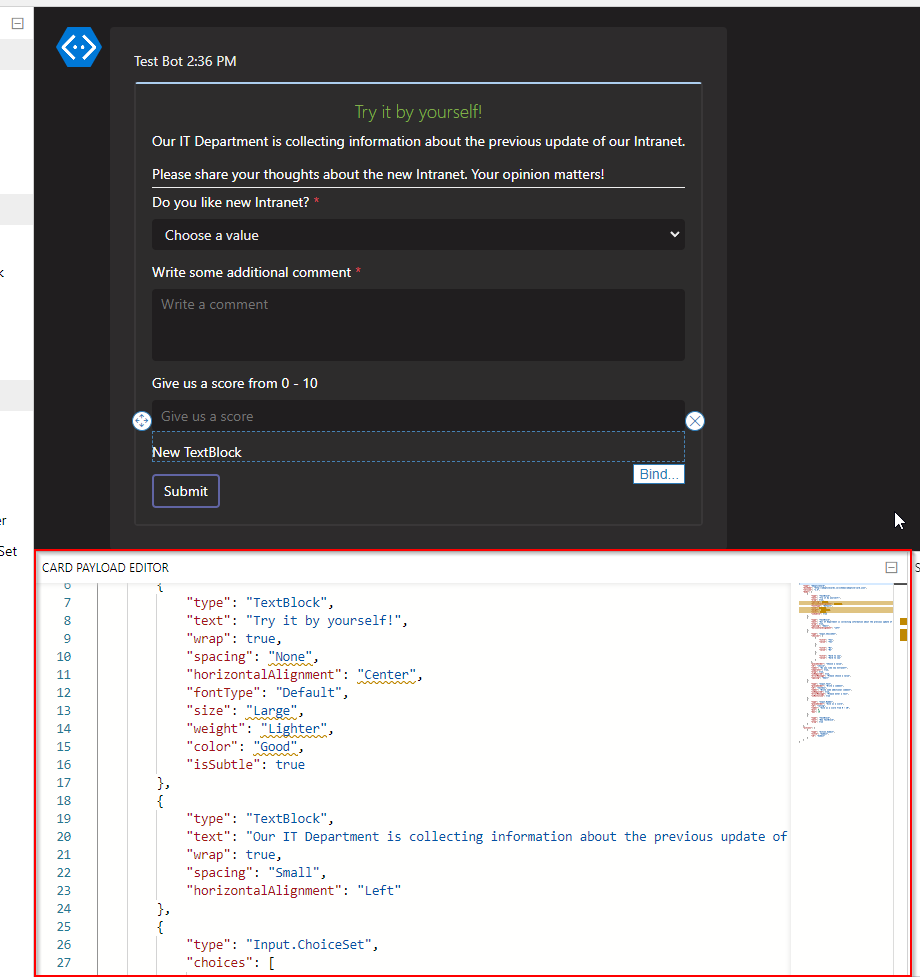
Where is my JSON code?
Your JSON code will be shown at the bottom of the Designer:
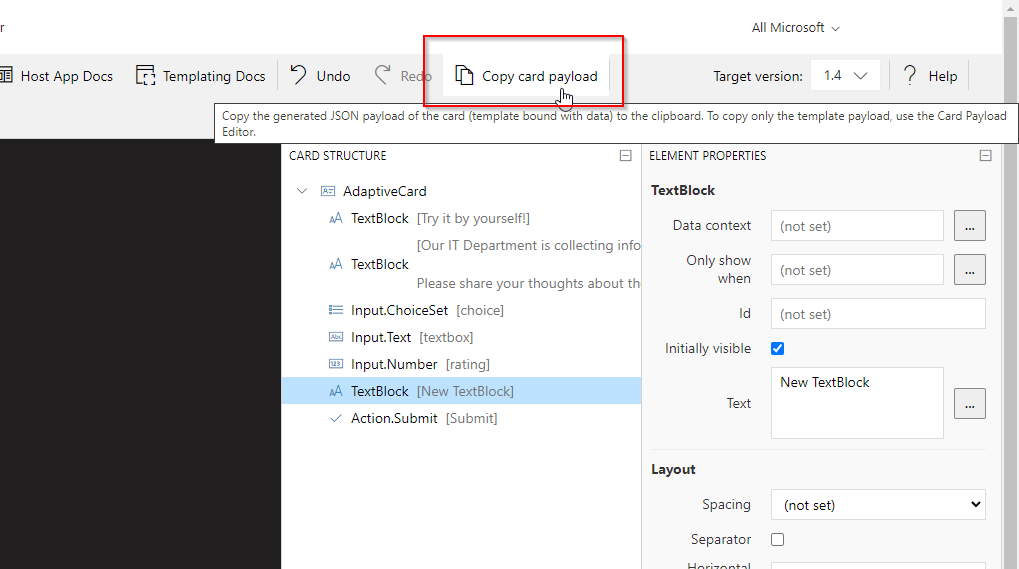
If your JSON code is ready to be used, click “Copy card payload” and paste it into your Power Automate flow action.
How can I add components to my Adaptive Card?
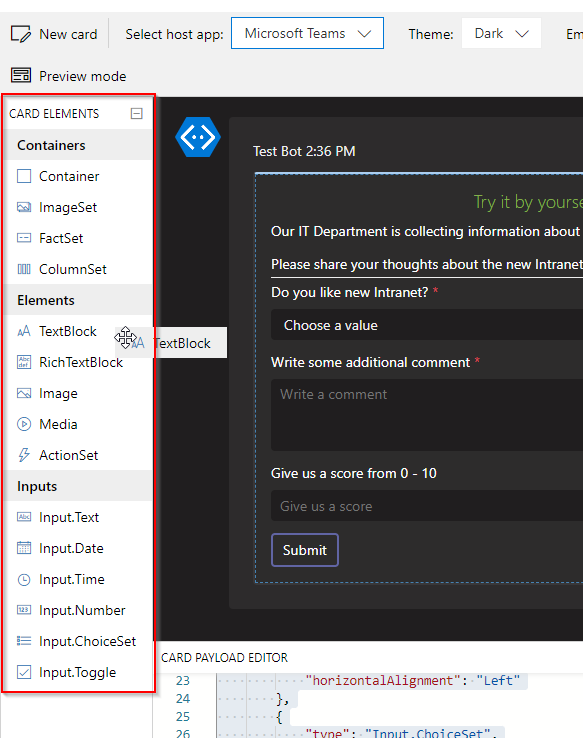
To add a component to your Adaptive Card, look at the left panel and choose whatever you want. There are “Containers” (for components) and “Elements” allowing you to present text, images, media, or buttons. In the end, ” Inputs ” enable users to input data into your Adaptive Card, so later on, you can work with it.
Where should I drop my components?
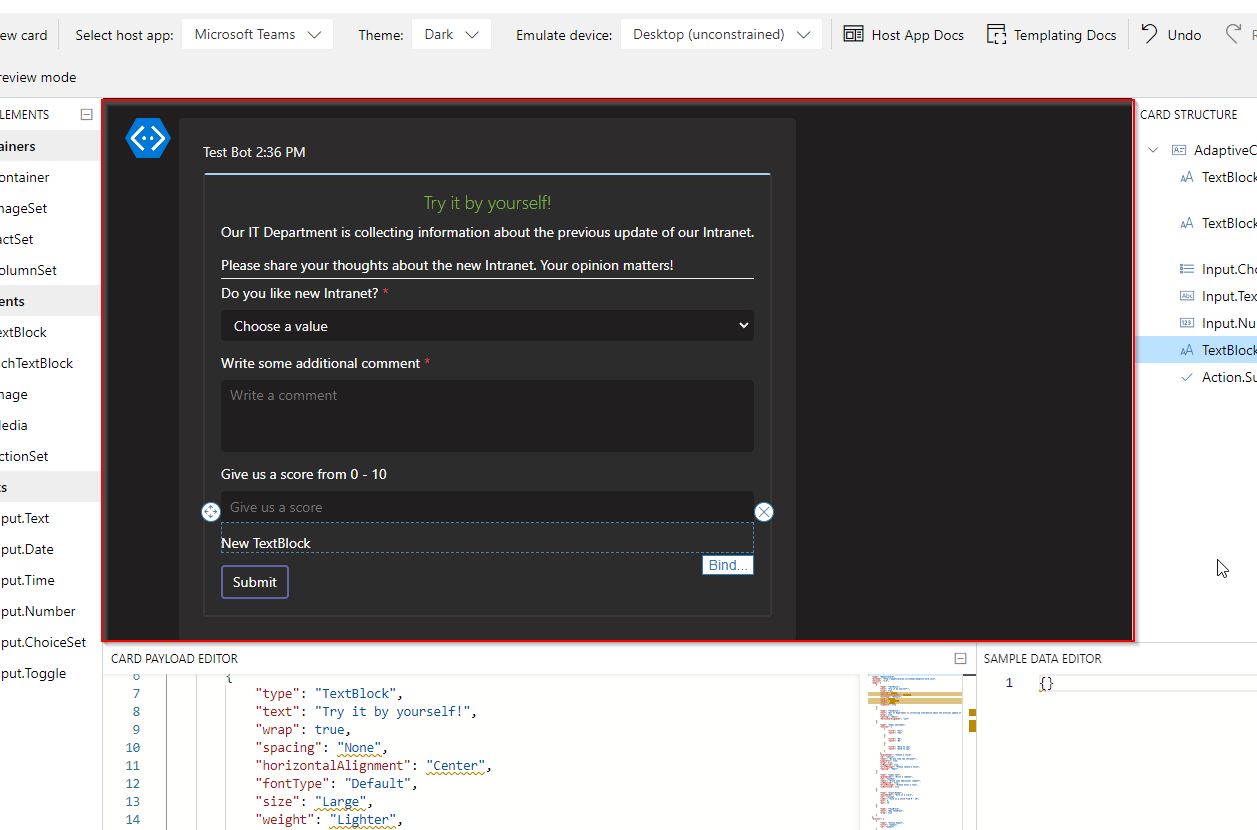
Components you want to use should be dropped in the middle of the screen – this is your working area.
How to configure my components?
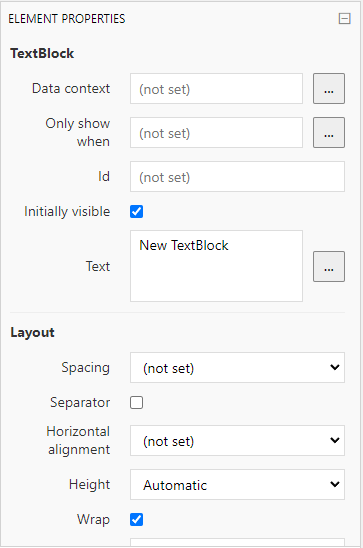
The configuration panel is on the right, where you should look for configuration elements. We will go through that in more detail later in this article.
Can I preview my Adaptive Card?
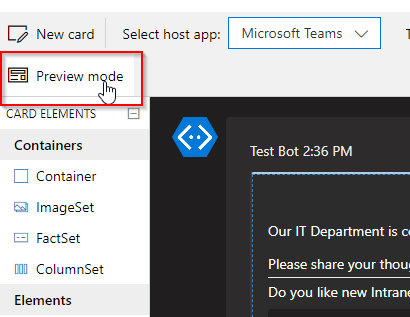
Sure! To preview your Adaptive Card, click “Preview mode” at the top panel. To go back to edit mode, click “Preview mode” again.
Let's build an Adaptive Card together
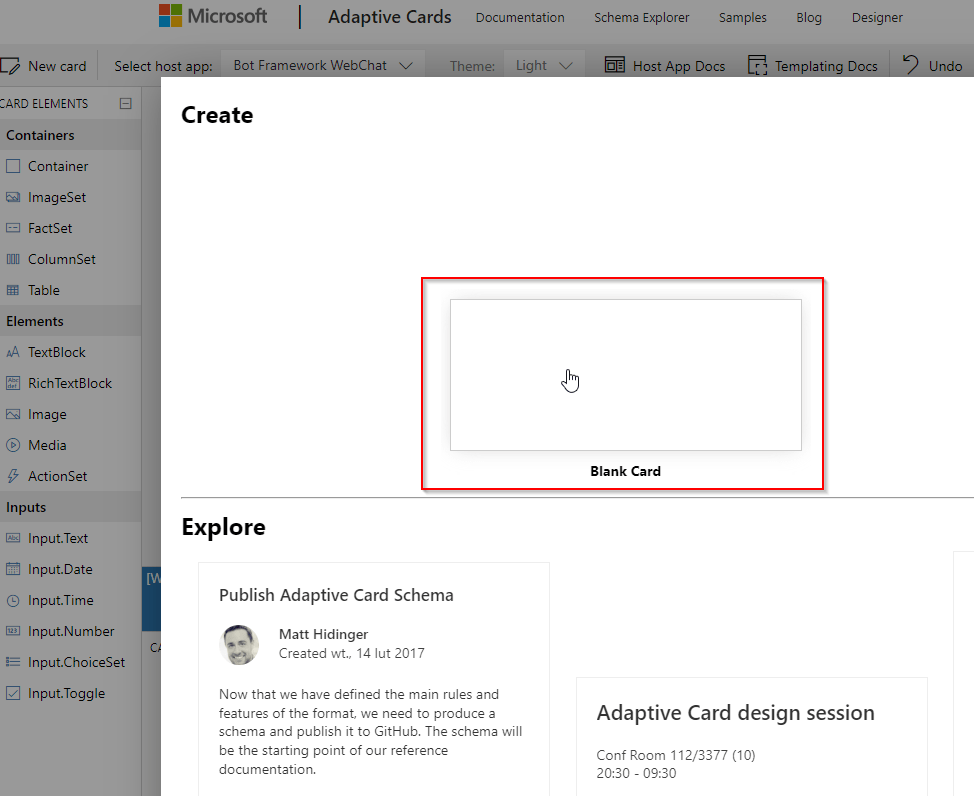
As I mentioned previously, navigate to the Adaptive Cards Designer to start working with Adaptive Cards. Then, go and click “New card” on the top and select “Blank Card”. We will begin with a blank Adaptive Card.
First, we must change the Host app to Microsoft Teams.
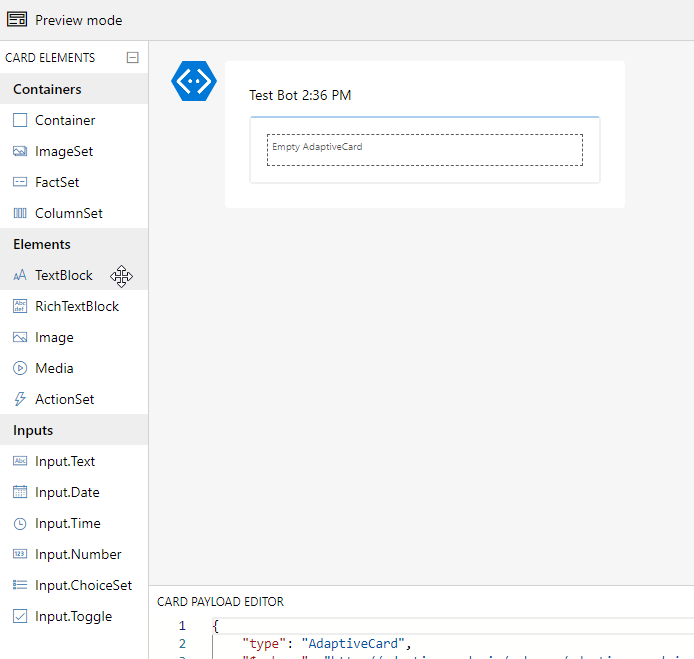
Now, we can start dragging our components to the working area.
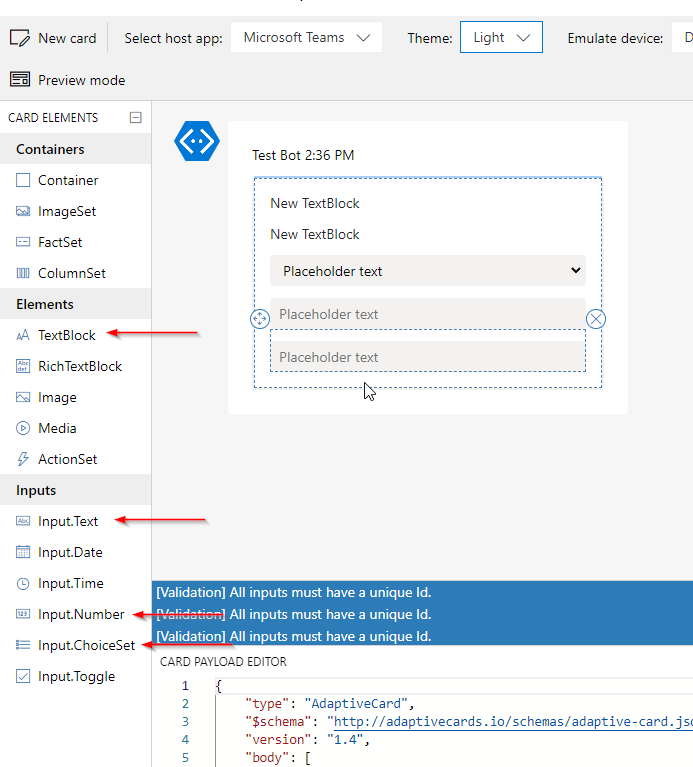
For our Adaptive Card, we need these components:
- TextBlock
- Input.Text
- Input.Number
- Input.ChoiceSet
Drag them into the workspace.
Now, we start configuring. To start, click the first field in a workspace and look right to the configuration panel.
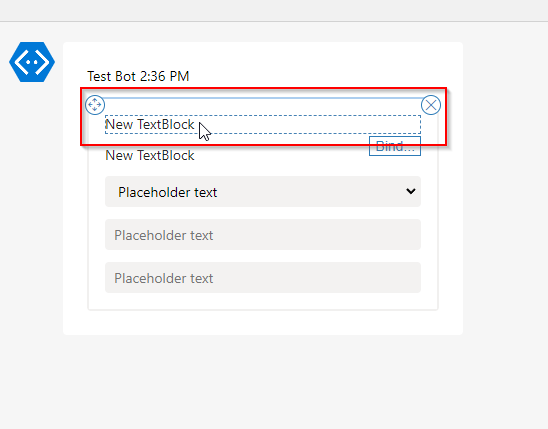
This is how your configuration should look before the changes.
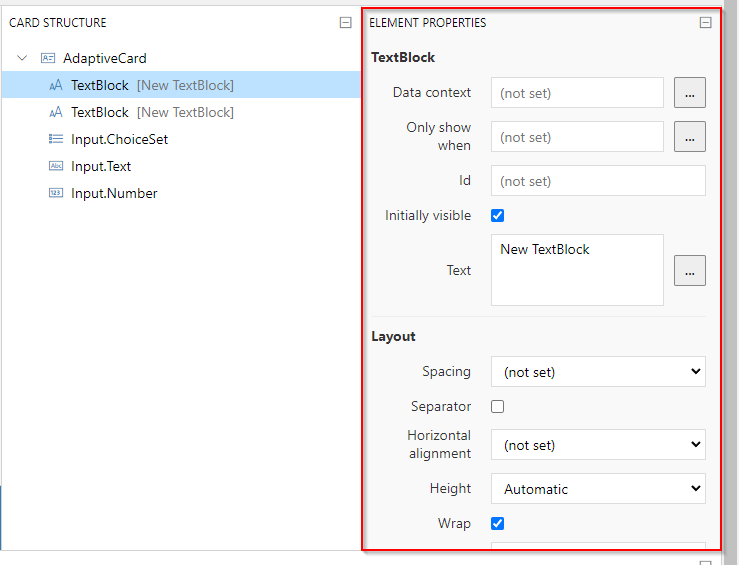
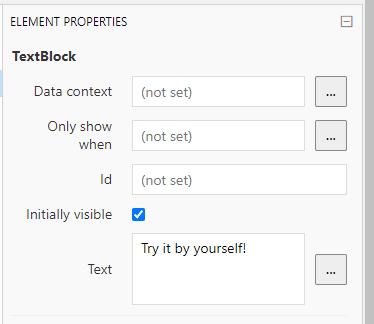
Let’s change the “Text” property to “Try it by yourself!”.
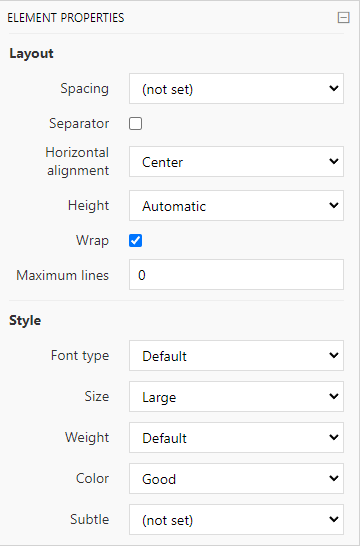
Adjust the layout as well. Change “Horizontal alignment”, “Size”, and the “Color”. As shown below:
Your text field should look like this! It is that simple. It was like one minute of configuration, and you have your title set up.
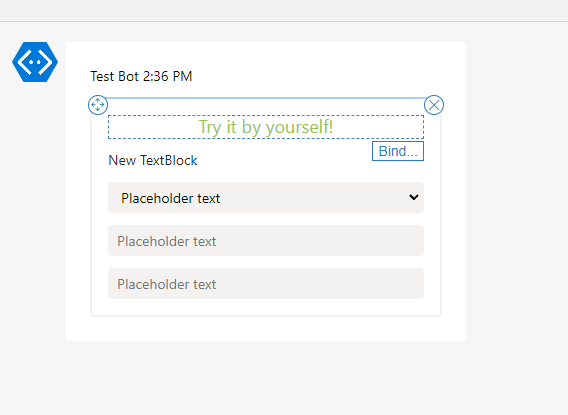
Now, let’s move to the second textbox. I didn’t change here much; I just added a text. The rest remains the same.
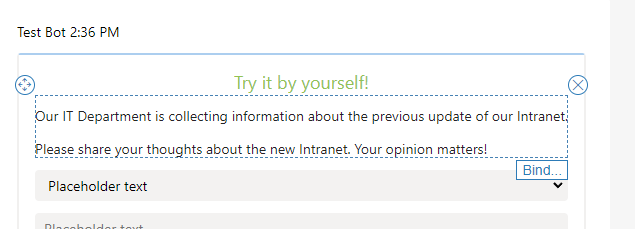
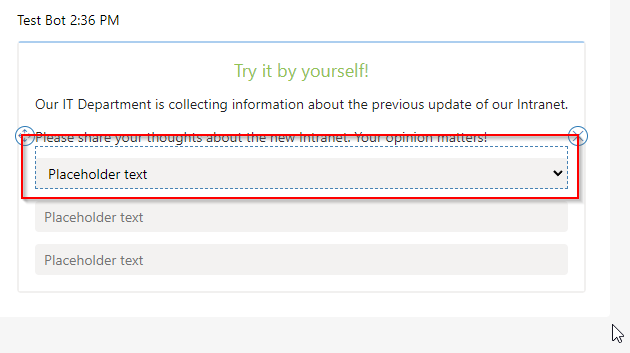
Now, the funny part begins. We will configure our input fields. Remember that every input field must have the “Id” field filled in.
The first one is a Choice field. Click the field and start configuring.
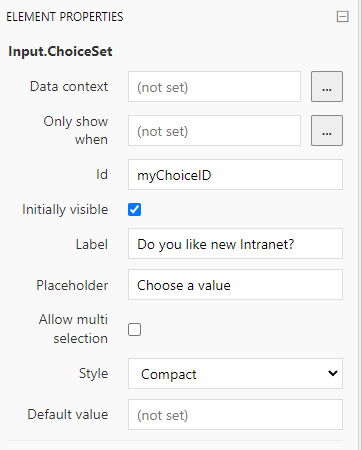
The configuration starts with the “Id”, “Label” and a “Placeholder” fields. Check out my configuration.
Now, the “Layout”, “Validation” and “Choices” parts. In “Validation” I marked the “Required” field and provided an “Error message”. In “Choices” I provided available choices as shown at the bottom of the screen.
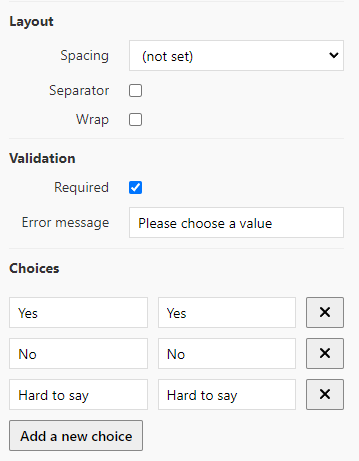
The configuration of our choice field is ready. Let’s see it in preview mode!
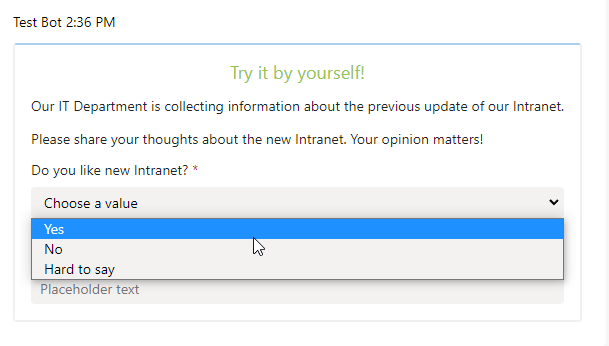
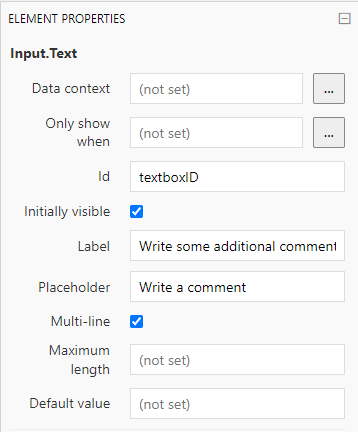
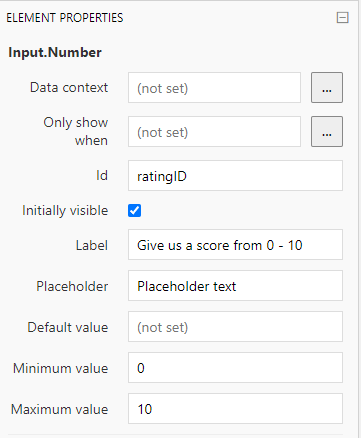
Finally, we must configure our two last inputs – Text and Number. I will quickly show you the configuration of those. It is straightforward.
This is the configuration of the text input field:
And this is the configuration of the number input field:
Our Adaptive Card is almost ready! This is how it should look like:
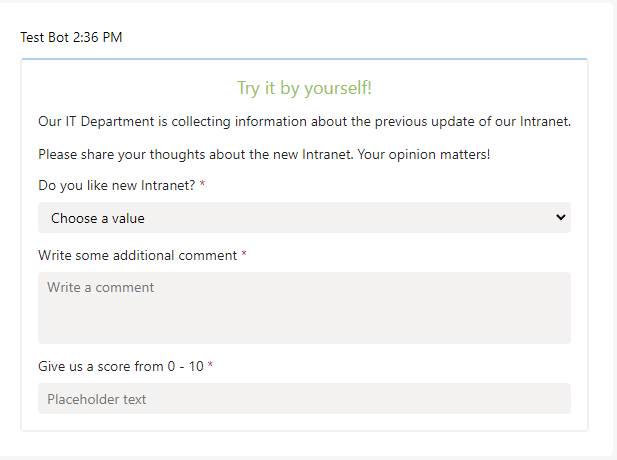
Finally, we must add a button that will allow us to collect the information from the user back to the Power Automate flow.
To do that, click on the whole Adaptive Card, so it will be highlighted, and click “Add an action” -> “Action.Submit”.
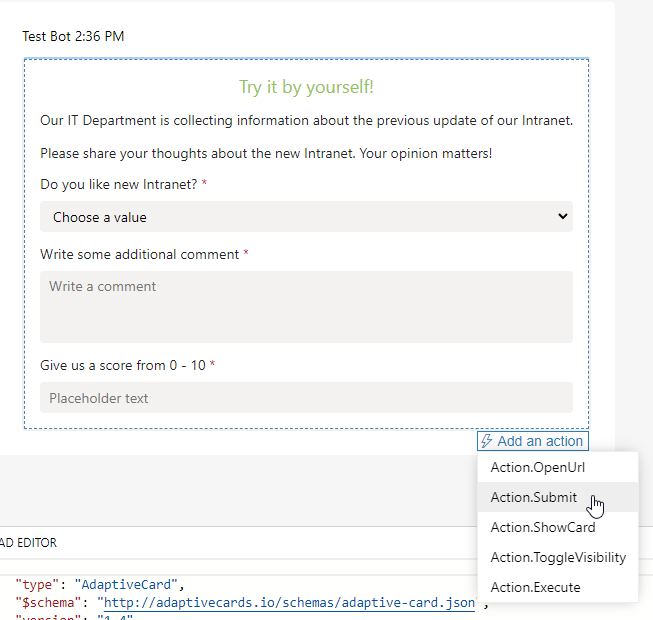
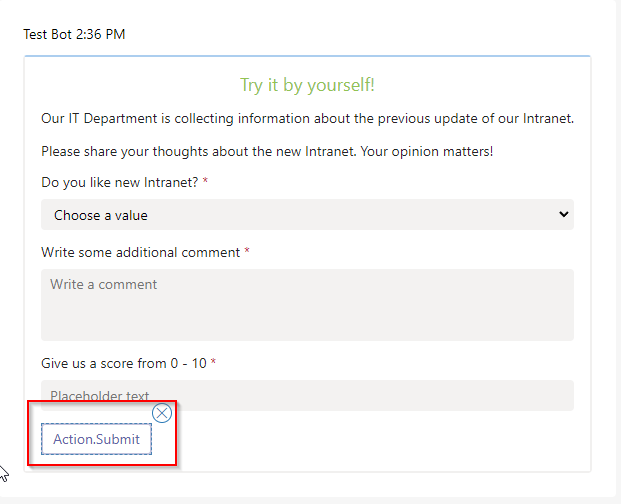
A button should be added:
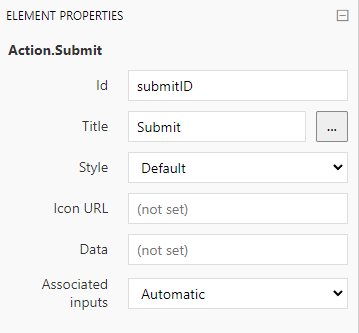
To properly configure this button, go to the configuration panel, provide “Id”, and “Title” and change “Associated inputs” to “Automatic”. The last thing is essential.
Now, let’s test our Adaptive Card! To do that, click “Preview mode”, fill in all data, and click the “Submit” button!
If you have this Submit popup on the top, it works!
How easy is that!
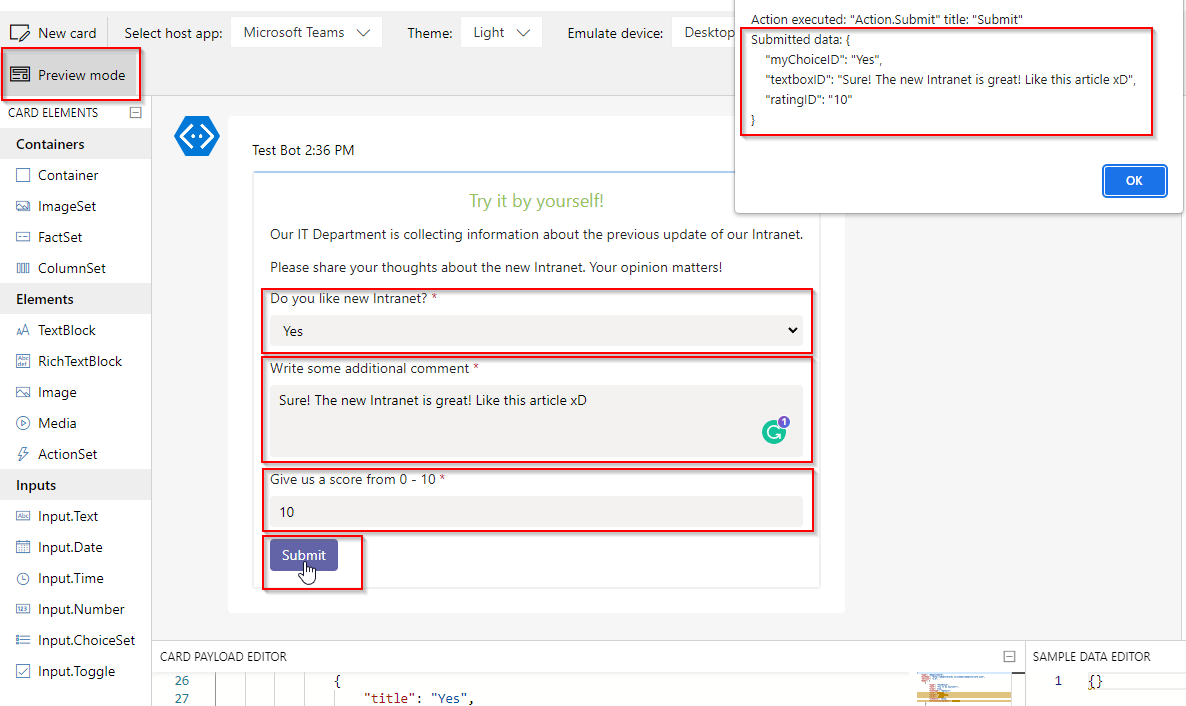
Let’s copy our JSON payload, and we can jump into Power Automate!
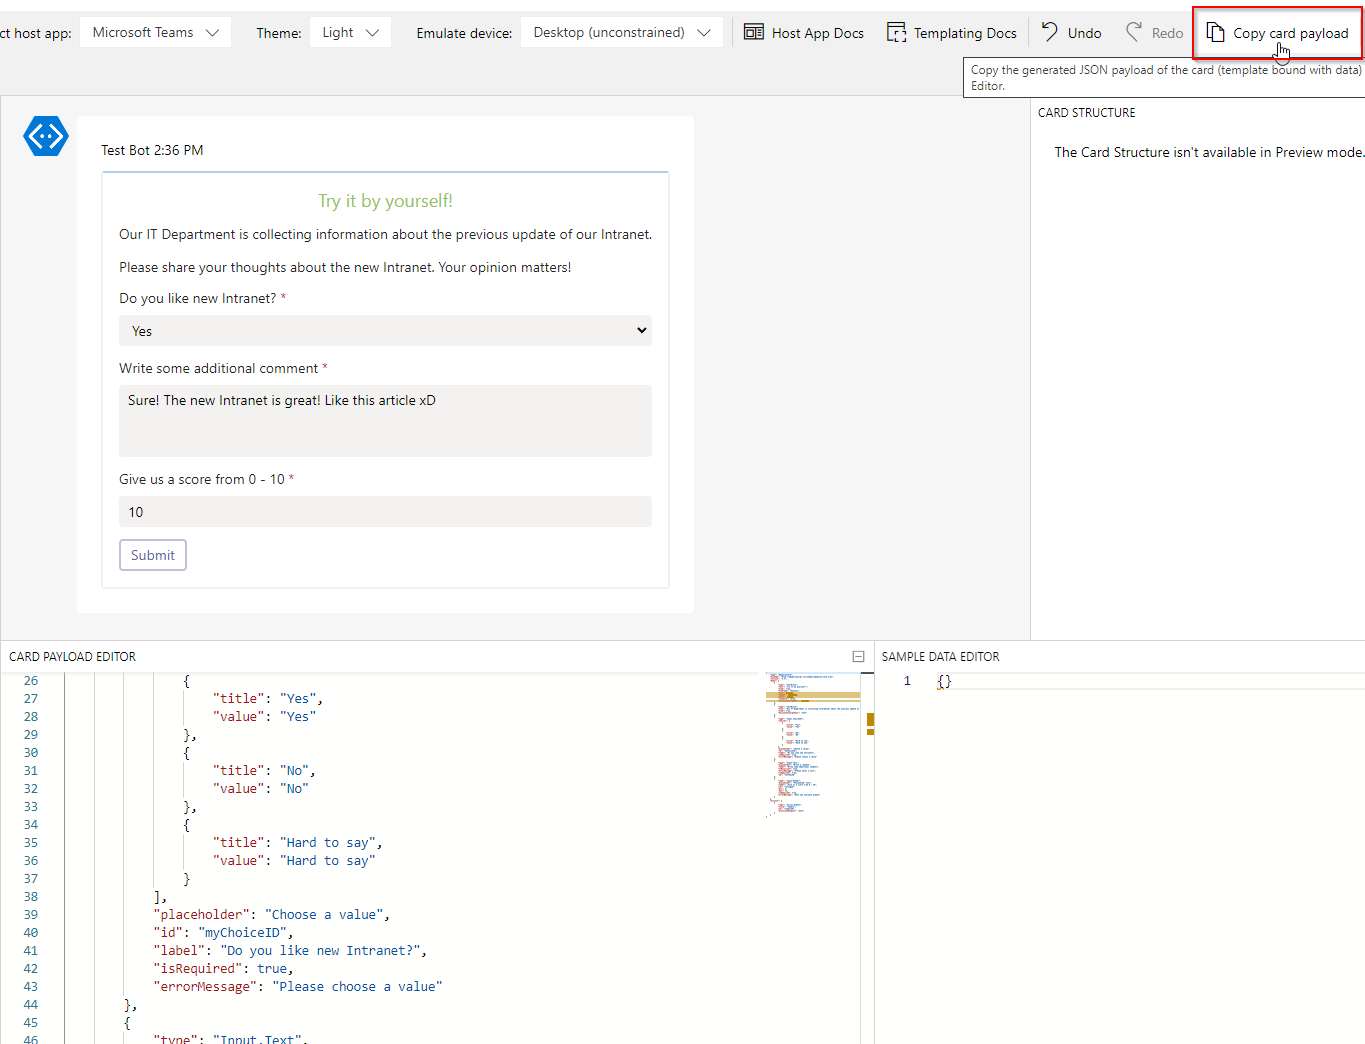
Post an Adaptive Card using Power Automate
To start, create a Power Automate cloud flow. For this particular example, I go with Instant flow so that we can execute it faster. Remember that it is only about the Adaptive Card.
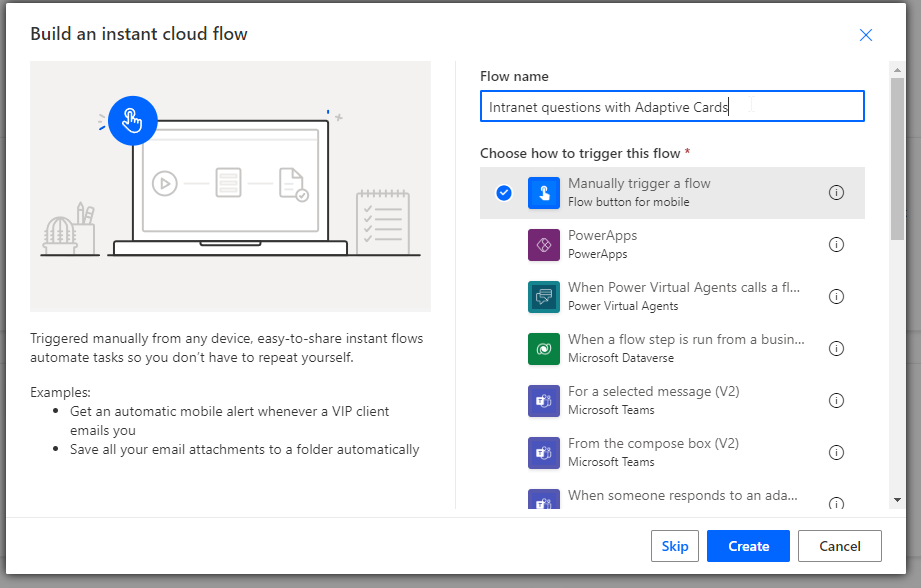
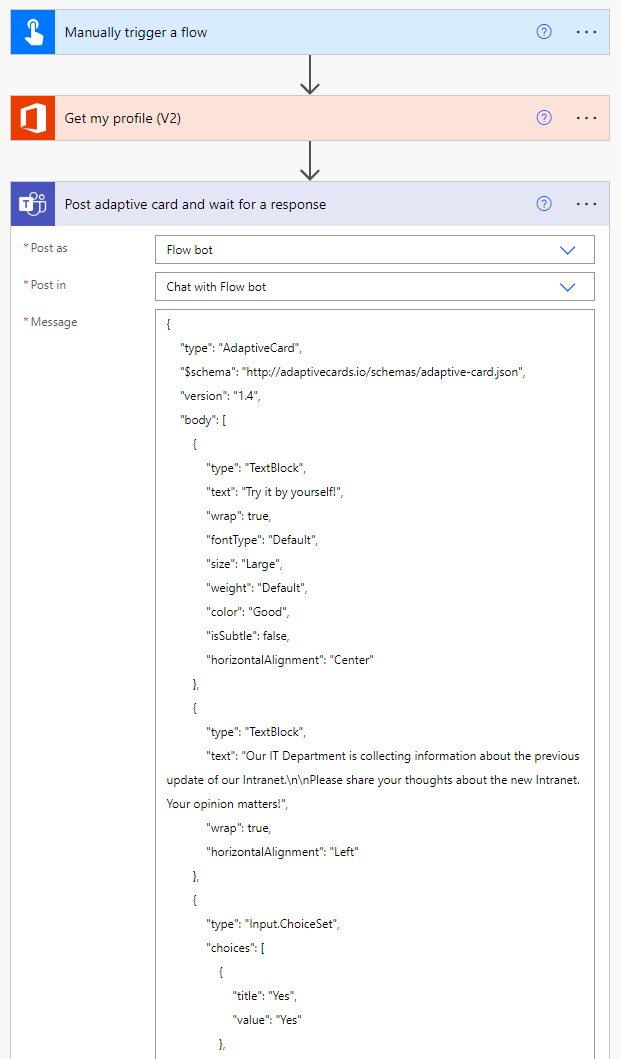
After creating a flow, we must define our recipient – the Adaptive Card recipient. To make it simple, I will get my Office 365 profile, and I will be the recipient of the Adaptive Card.
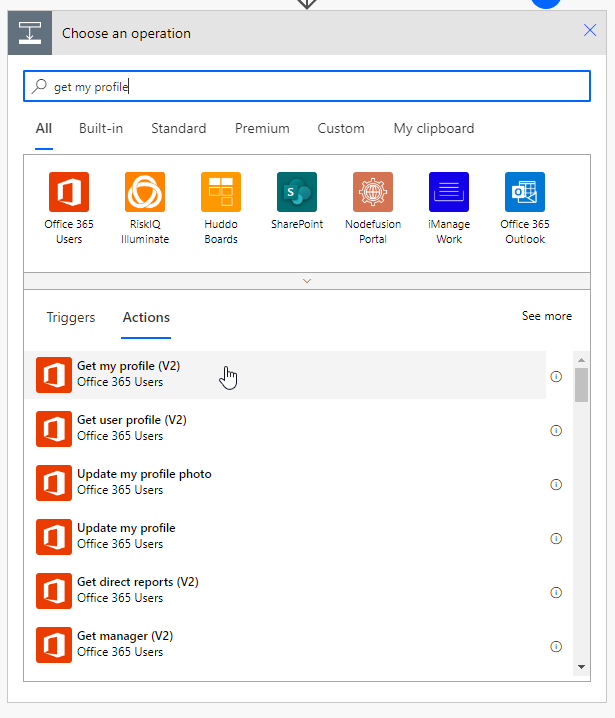
Then, we must add an action that will allow us post an Adaptive Card in Teams:
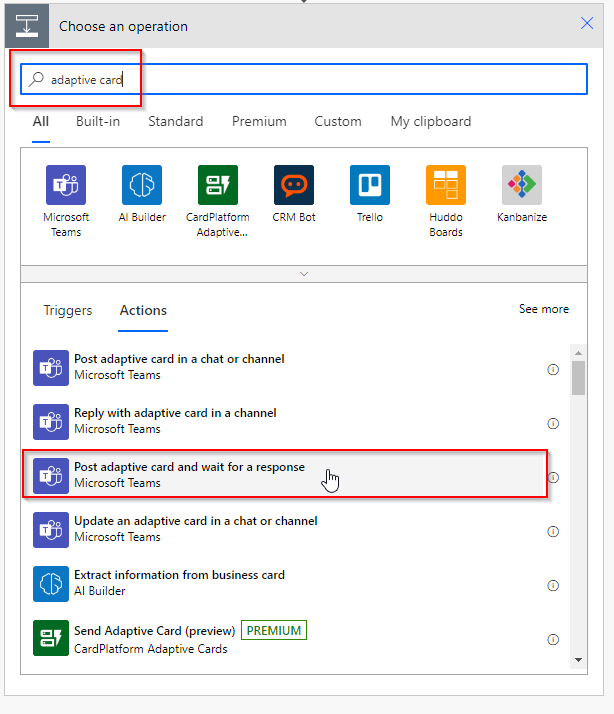
Now, configure this action. The parameters and the values are shown below.
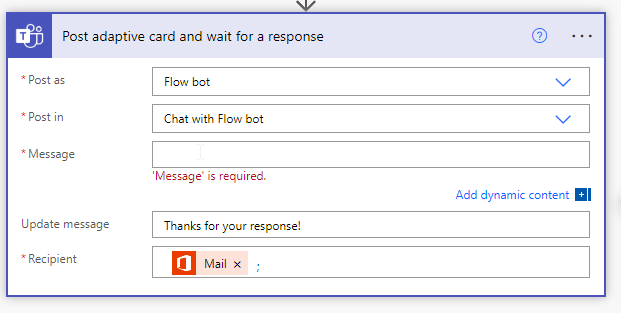
As for the “Message” property, paste the payload you copied on Adaptive Cards Designer.
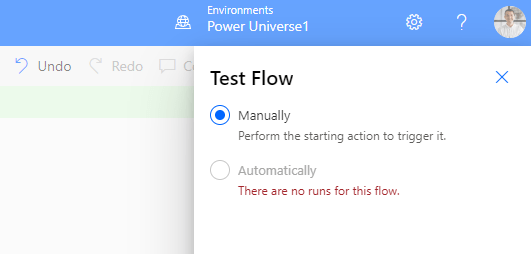
Now, save the flow and test it “Manually”:

Open your Teams chat; you should see the “Power Automate” chat and the new message with the Adaptive Card!
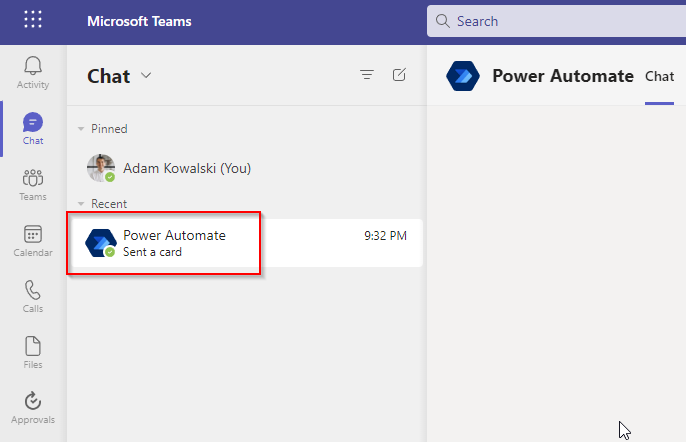
Here is how it should look like:
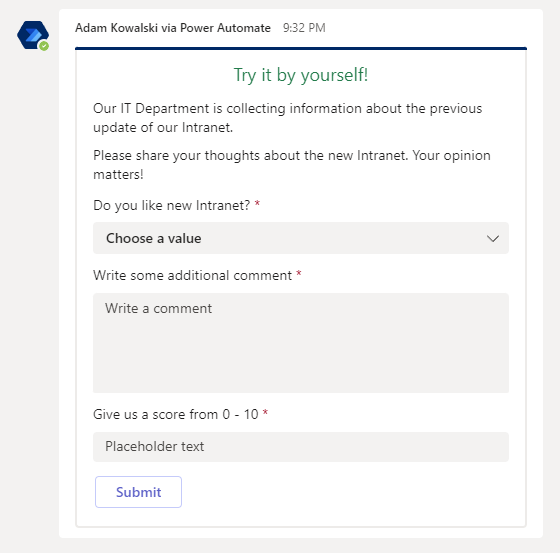
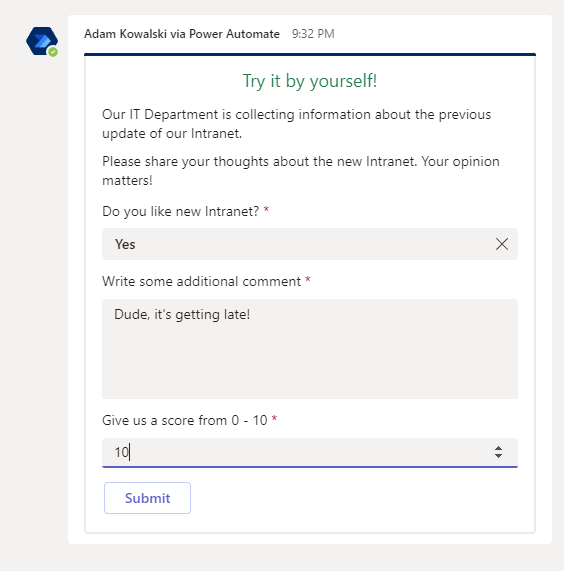
Provide answers and click the “Submit” button.
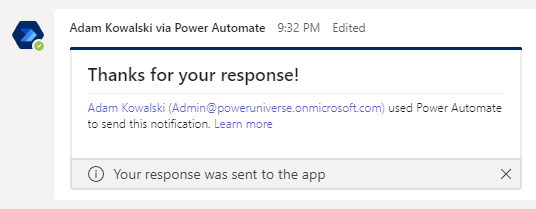
Your response has been submitted. This Adaptive Card should be visible after you click the “Submit” button.
Now, let’s go back to the Power Automate flow. As you can see, my flow run is successful!
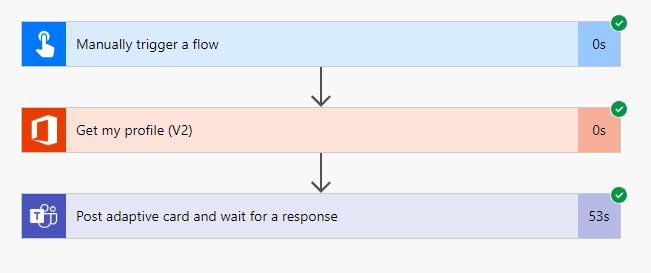
You can click on a “Post adaptive card and wait for a response” action and see raw outputs.
The essential part of this output is displayed at the bottom! It is the “data” part, and it presents the user inputs! We can use them in our flow.
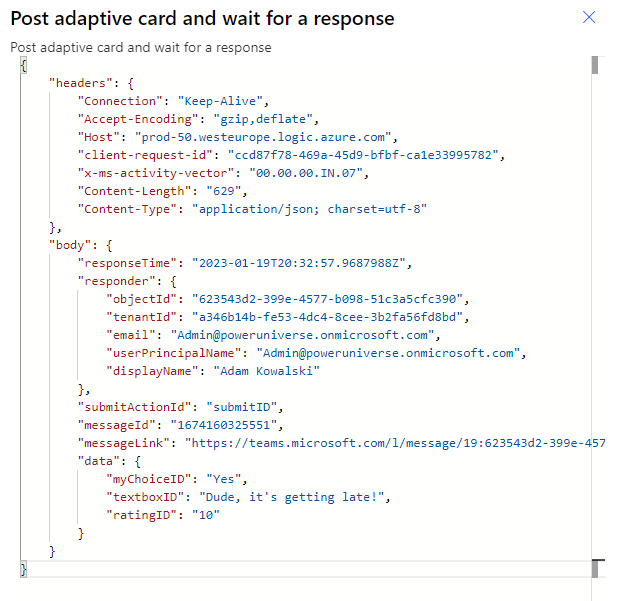
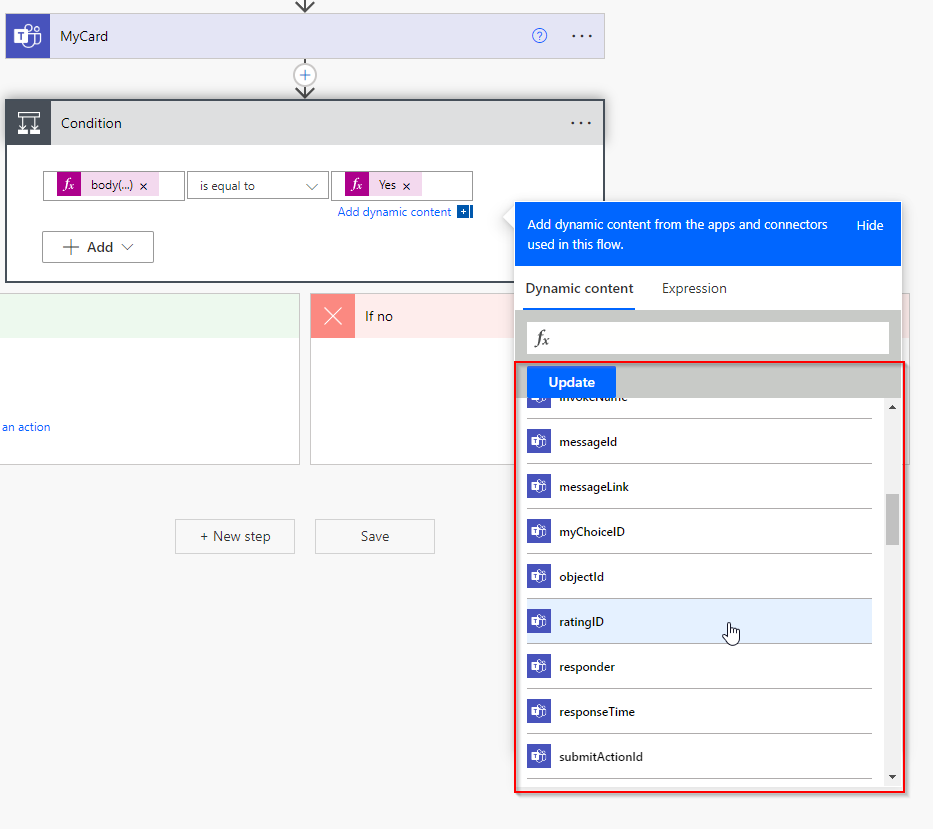
But.. How are we going to use them? I am not seeing any data in my “Dynamic content”!
You must do the little magic trick to show the properties of the action we just invoked.
Create a condition below the action and in the “Expression” write this:
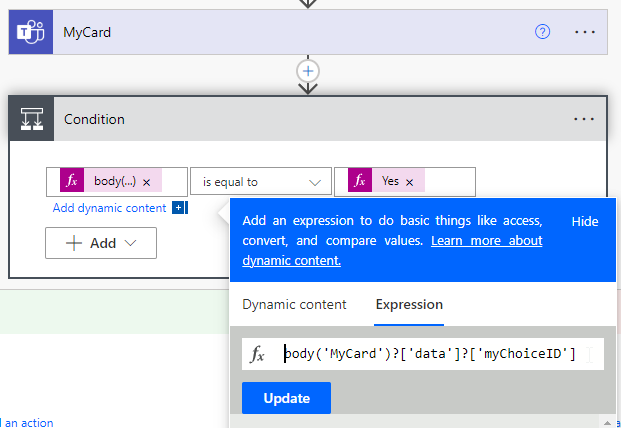
body('MyCard')?['data']?['myChoiceID']
“MyCard” is the name of the action, and “myChoiceID” is the ID of the Choice field from Adaptive Cards Designer.
Then, provide “Yes” in the condition on the right, save and test the flow again!
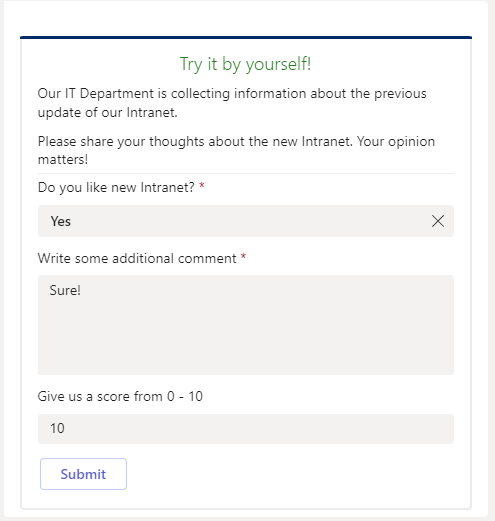
Here are the raw outputs.
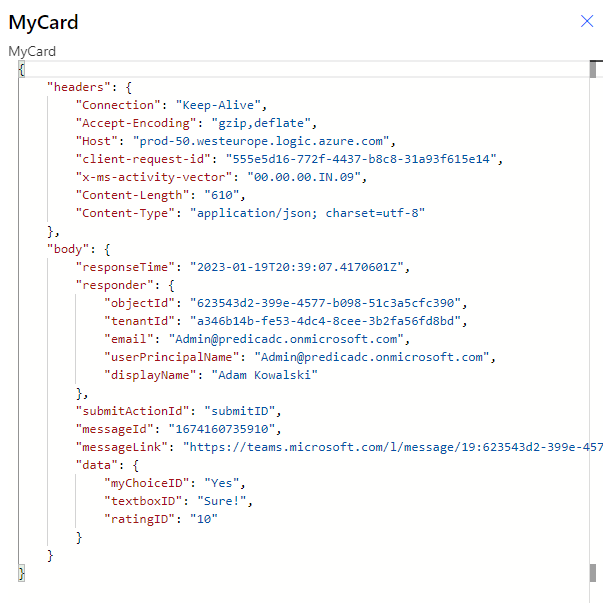
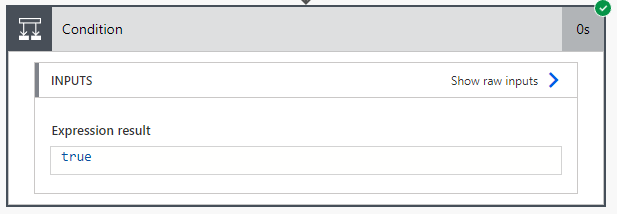
Here you can see that the condition has been met! So the condition works, and we got the user’s response right!
Now, open the “Dynamic content” and check your available fields! You now have access to all of your parameters! So you can later use them in the flow!
Have fun!
Summary

This wasn’t so hard, many screenshots later, but finally, we are here at the summary!
While writing this article, I was again amazed at how easy it is to create an Adaptive Card, post it in Teams chat, and get some inputs back to the Power Automate flow! Cmon, this was so straightforward. This is low code. This is what you can do. Adaptive Cards are fun, and they are very, very useful. Microsoft uses them in the Power Platform Center of Excellence and many other places. Many companies use them to provide users with information and get some back. Learn them because this knowledge will be essential for you as a low-code developer!
So, finally, we are at this point where I should thank you for your time and reading this article. Feel free to rate this article and comment if you liked it. If you have any questions, feel free to contact me (via contact@poweruniverse.org), but first, you may be interested in joining a Newsletter. Hmm? (Sign up here) If you already did, wow, thanks, thanks a lot 
Via Newsletter, I am sharing insights into my work, plans for upcoming weeks, and knowledge about Power Platform Universe and the IT world. If you are interested, feel free to join! I am going to send the latest Newsletter to everyone who enters!
See you!

Daniel Ciećkiewicz
I am a Senior Power Platform Consultant focused on Dataverse, Power Apps, and Power Automate. I was also a Team Leader responsible for the Power Platform Team and their development paths.
In my private life, I like video games, sports, learning & gaining knowledge, and a taste of good Scotch Whisky!
Ooo, I almost forgot, I love our Polish Tatra Mountains!

Power Apps Licensing Explained
Power Apps Licensing – this is something every Power Platform expert must know. In this article I will walk you through the cons and pros of available plans.

Understand Delegation in Power Apps
In this article I will walk you through delegation in Power Apps and I will show you many interesting concepts how to work with delegation and understand Delegation in Power Apps!

Connection vs connection reference in Power Platform
In this article I will tell you what is the difference between connection and connection reference in Power Platform. It is very good to know the advantages.

Overview of a Tenant Isolation in the Power Platform
What is Tenant Isolation in the Power Platform? How does it work and how do you know it will be good for your organization? Check the article!

The most interesting Power Platform features of 2024 – Wave 1 update
Do you want to know what updates are coming in 2024? This article will tell you more about incoming updates for Power Platform in Wave 1.

Use a Service Principal to run Dataverse actions in Power Automate
Do you want to learn how to use a Service Principal to work with Dataverse actions in Power Automate? This article is for you. Check it out.